Skip to content
Secure checkout
Account
Basket£0.00

No products in the cart.

Home / Mushroom Cultivation / Mushroom Grow Kits / Cylocybe Special MycBox (GK/S)

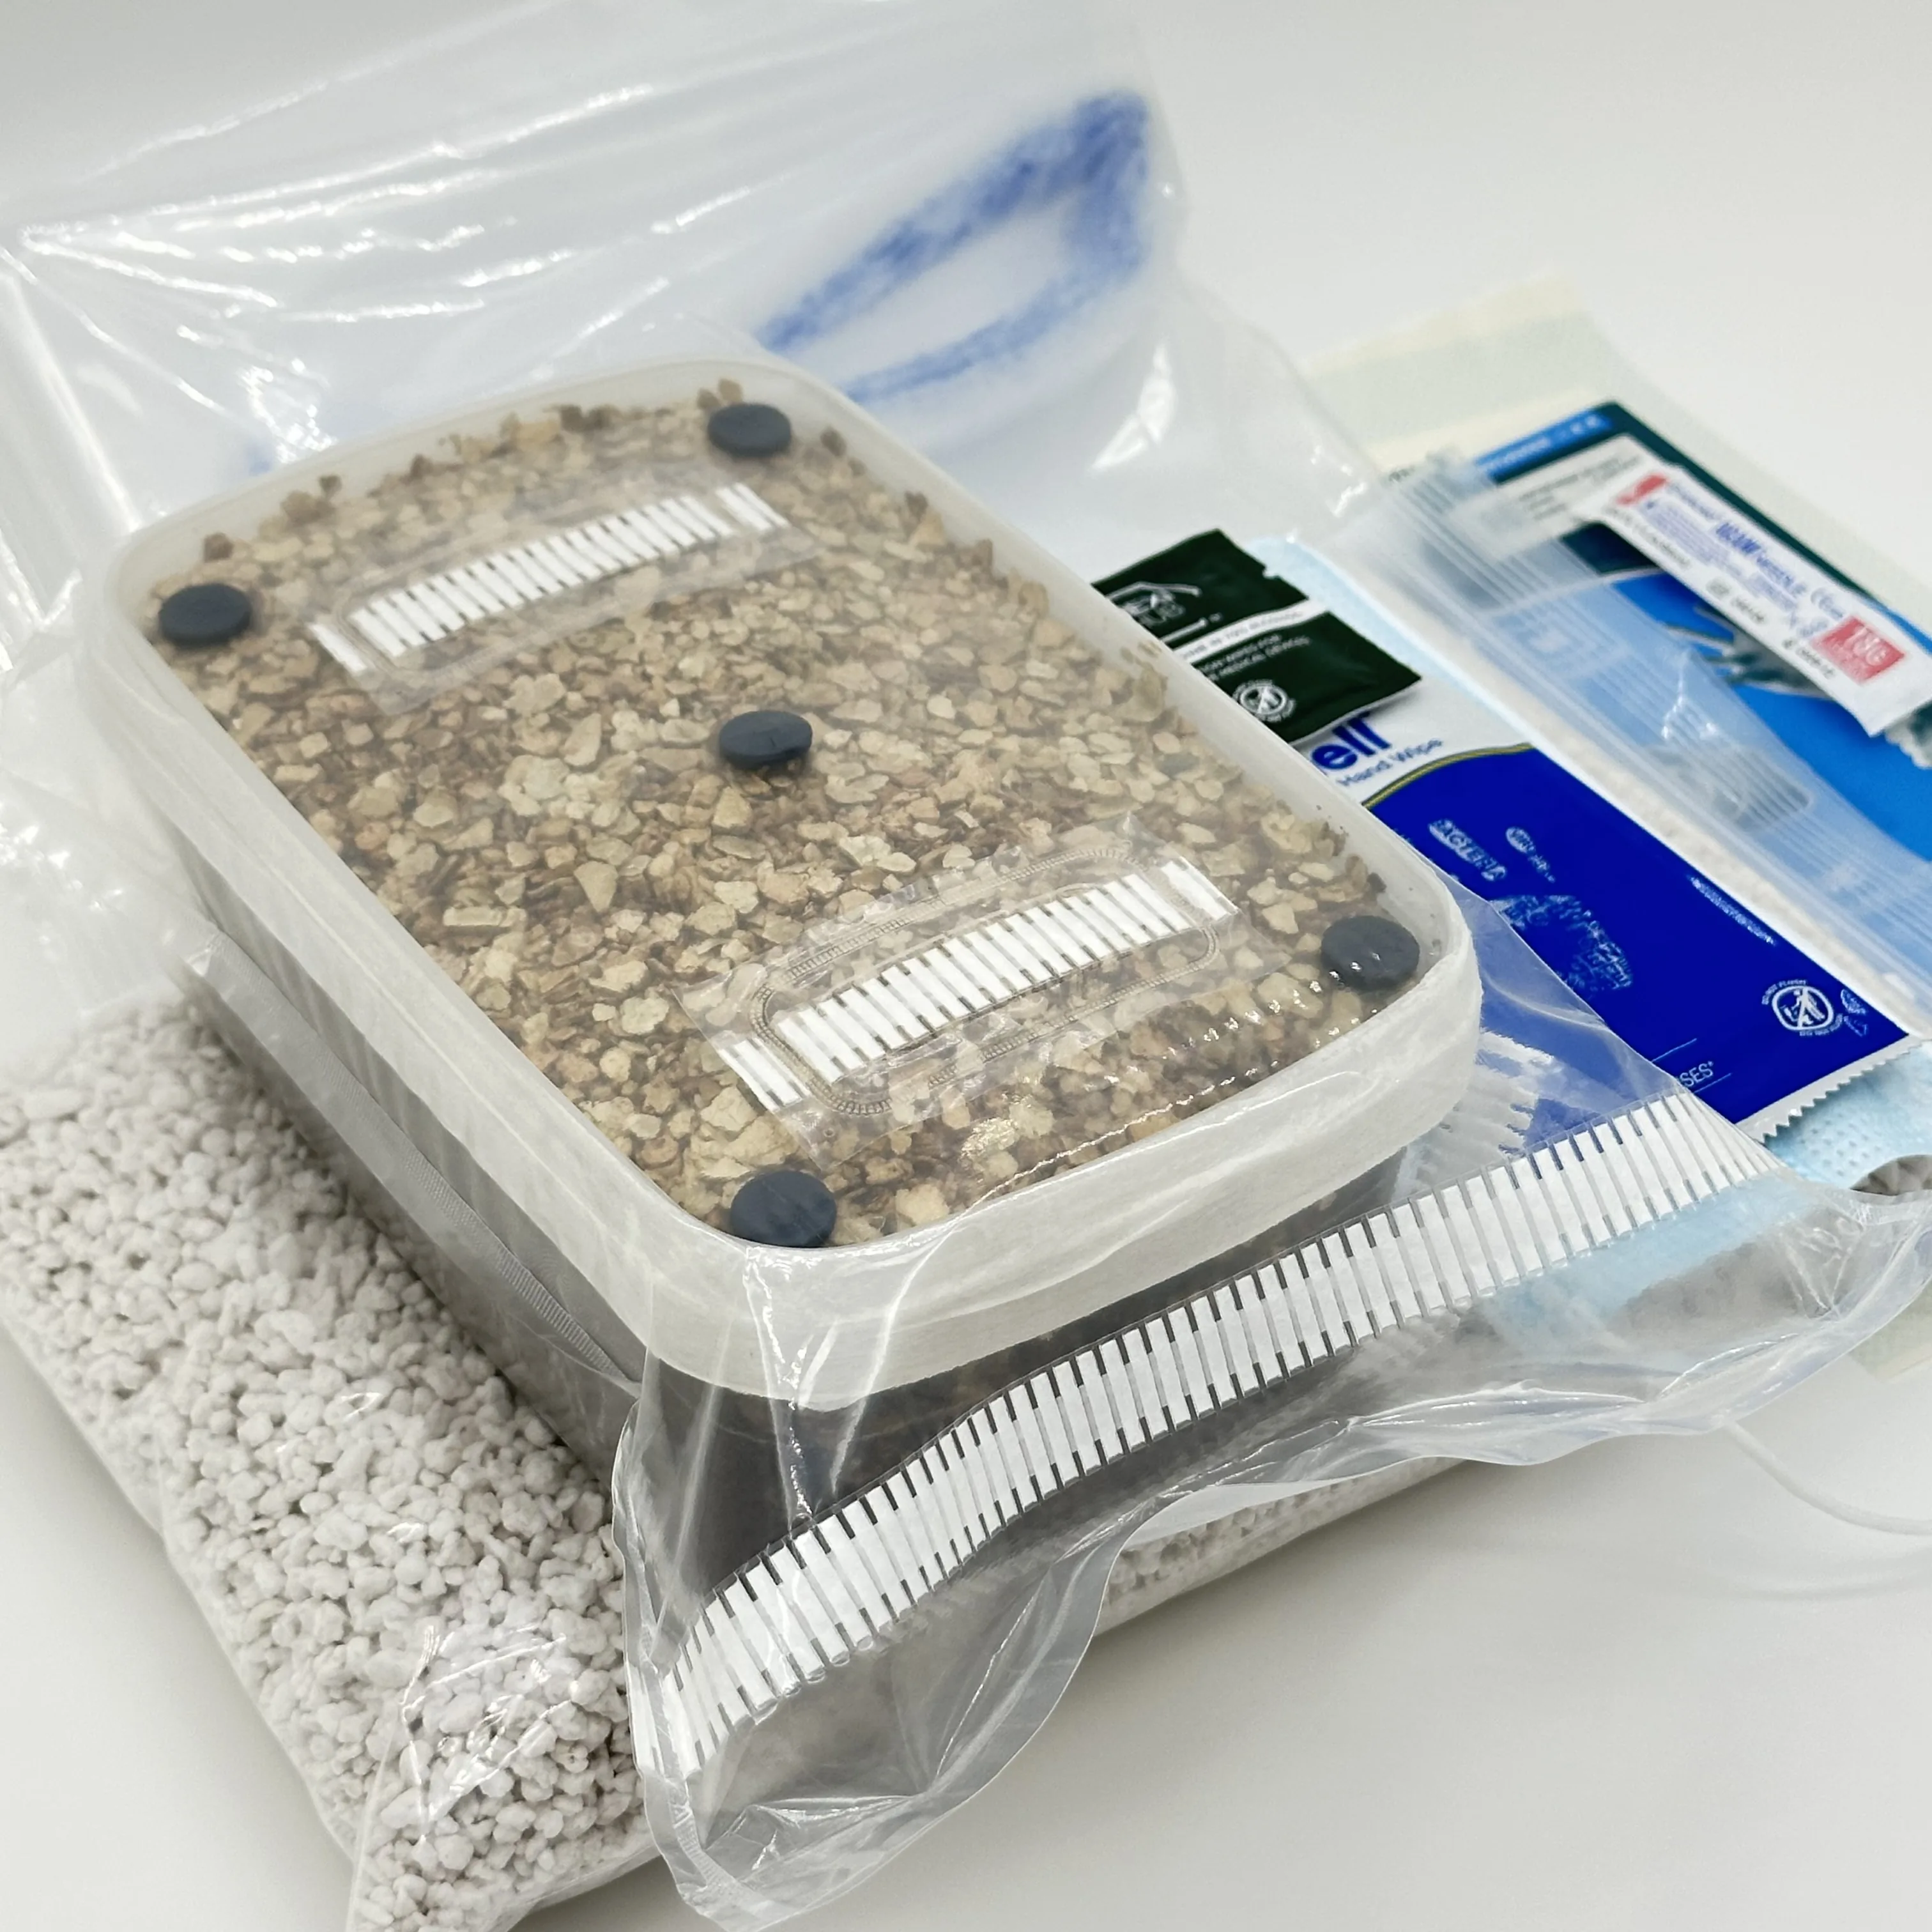
EZ-Replacement A close look at the top of the sealed grow tub in the XL Cylocybe Special MycBox, its bed of coarse vermiculite behind two white filter strips and five black rubber injection ports, resting on the bag of perlite with the gloves, mask and wipes alongside 1 / 9
Show: A close look at the top of the sealed grow tub in the XL Cylocybe Special MycBox, its bed of coarse vermiculite behind two white filter strips and five black rubber injection ports, resting on the bag of perlite with the gloves, mask and wipes alongside
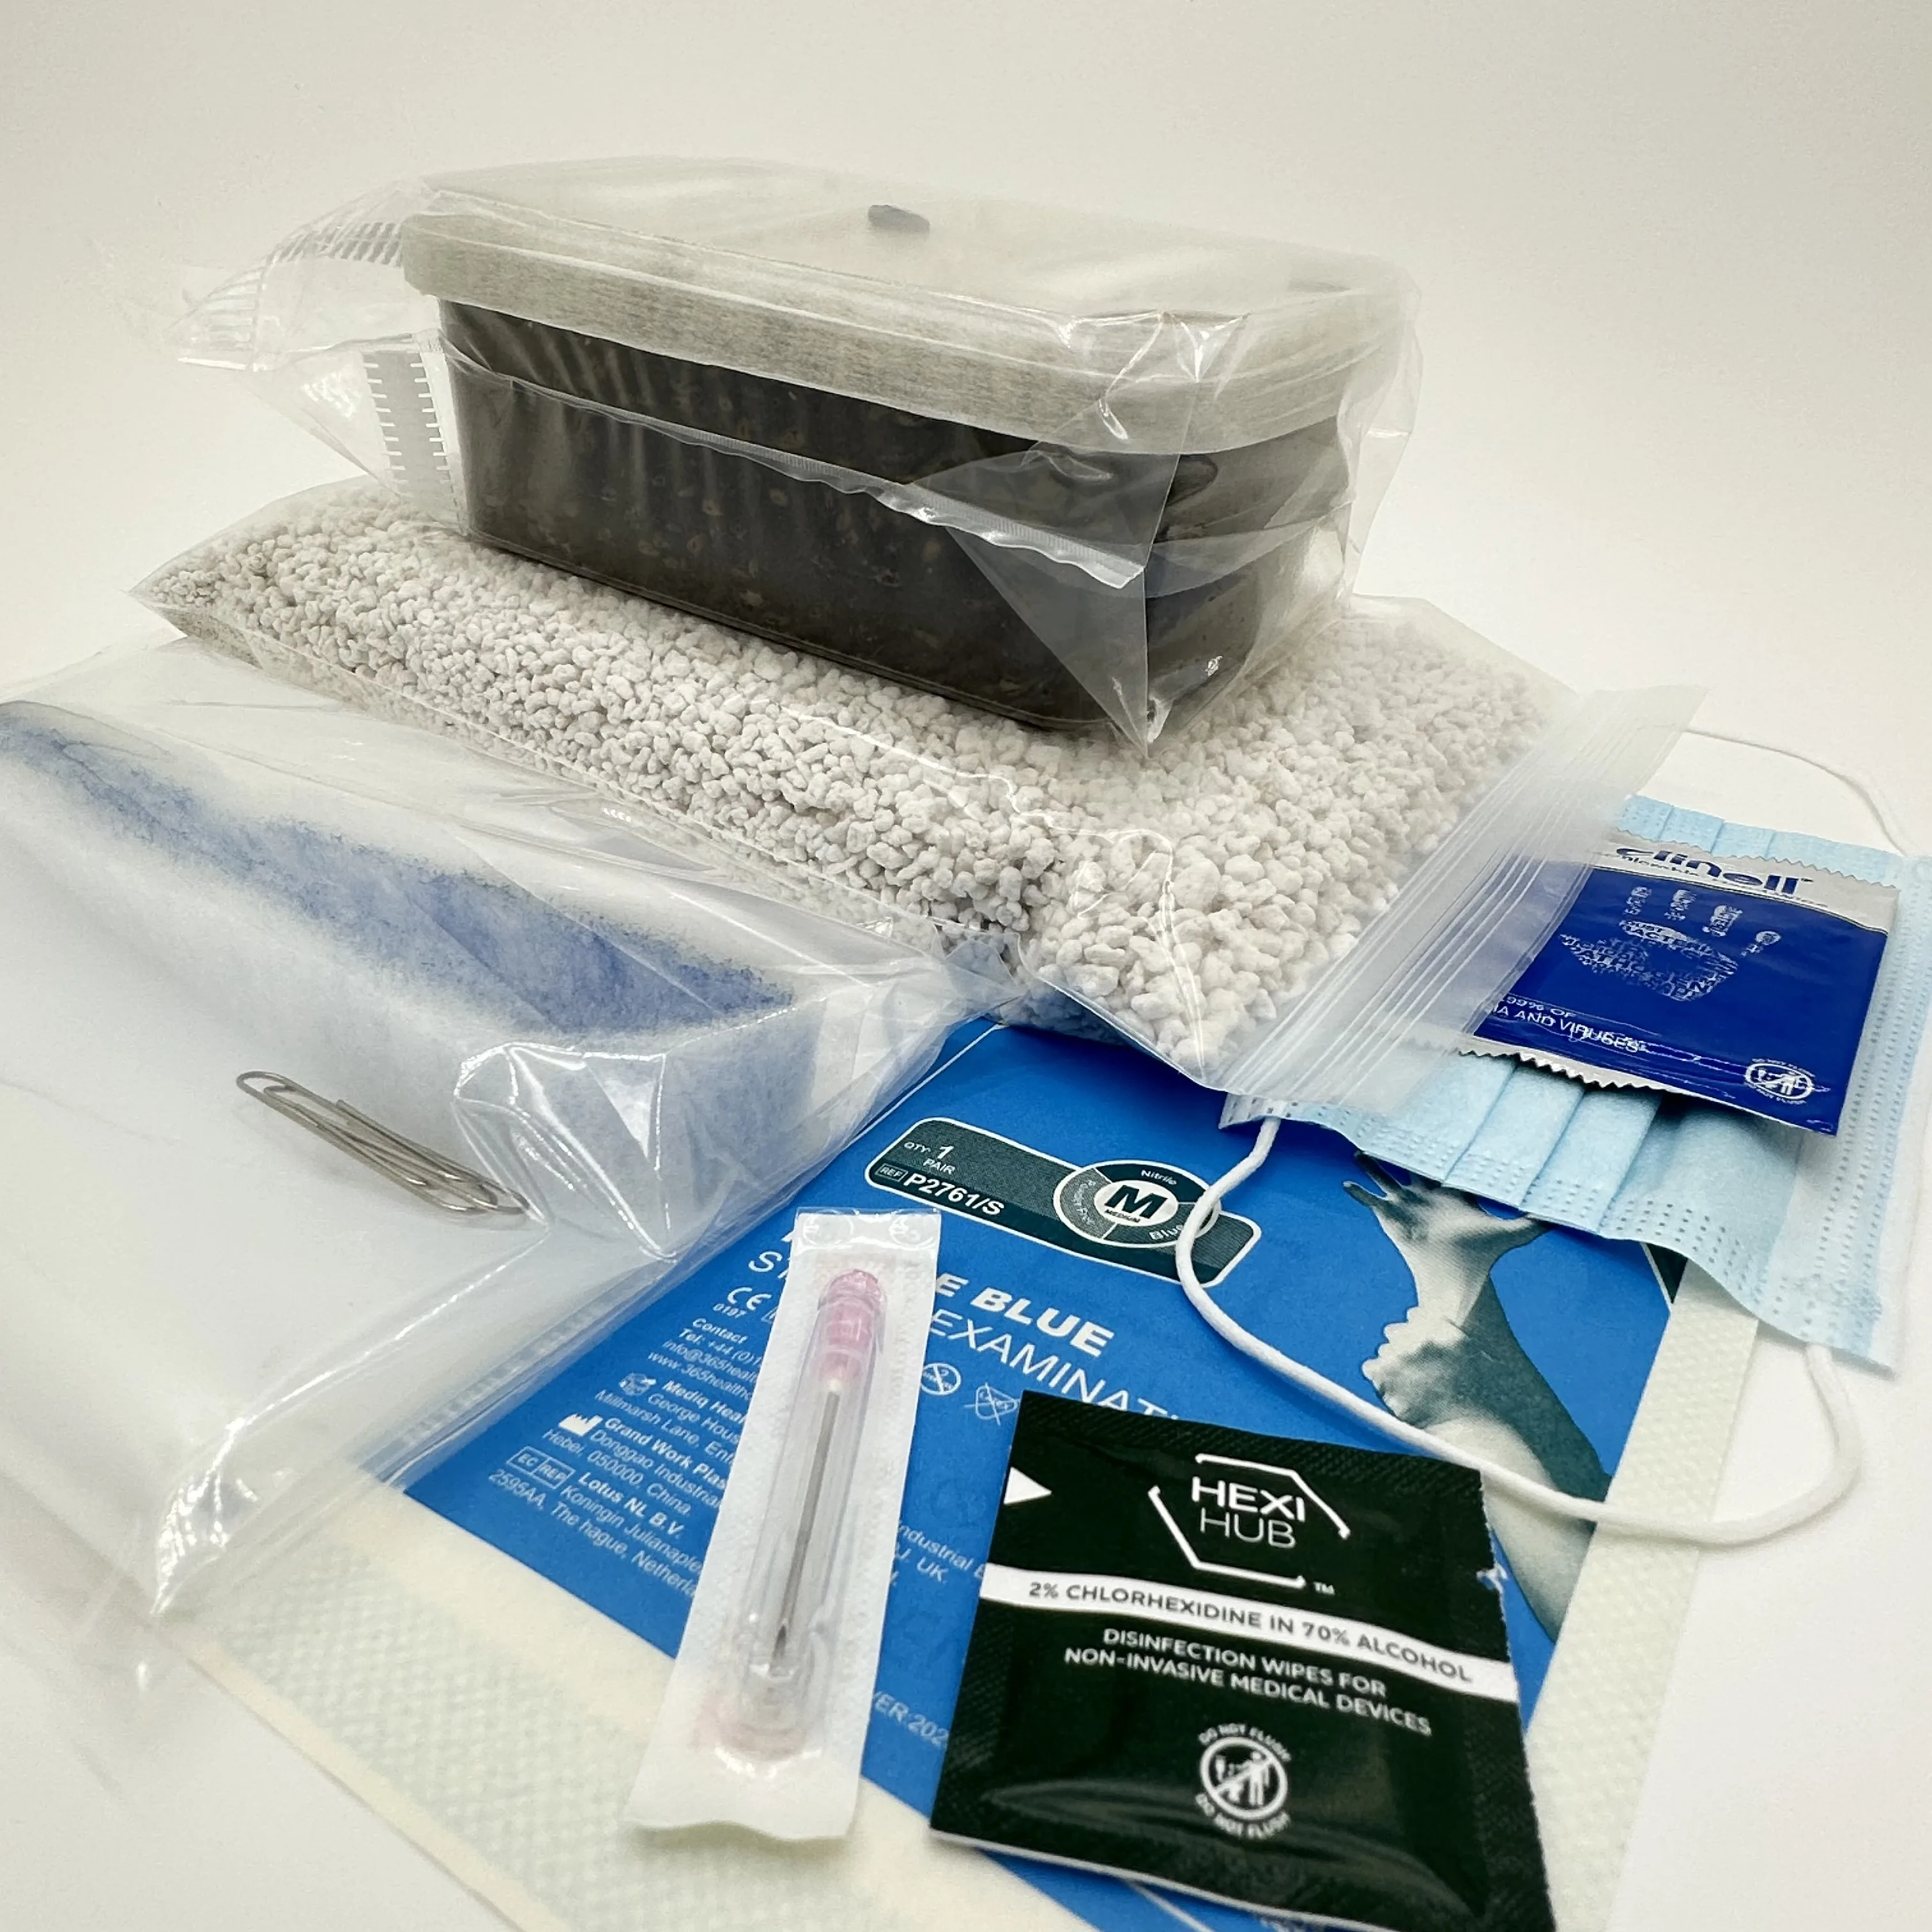
Show: The Grow Kit version of the XL Cylocybe Special MycBox seen from the side, its sealed tub of dark substrate resting on the bag of perlite, with the liner bag, nitrile gloves, face mask, alcohol and chlorhexidine wipes and a sterile syringe laid out in front
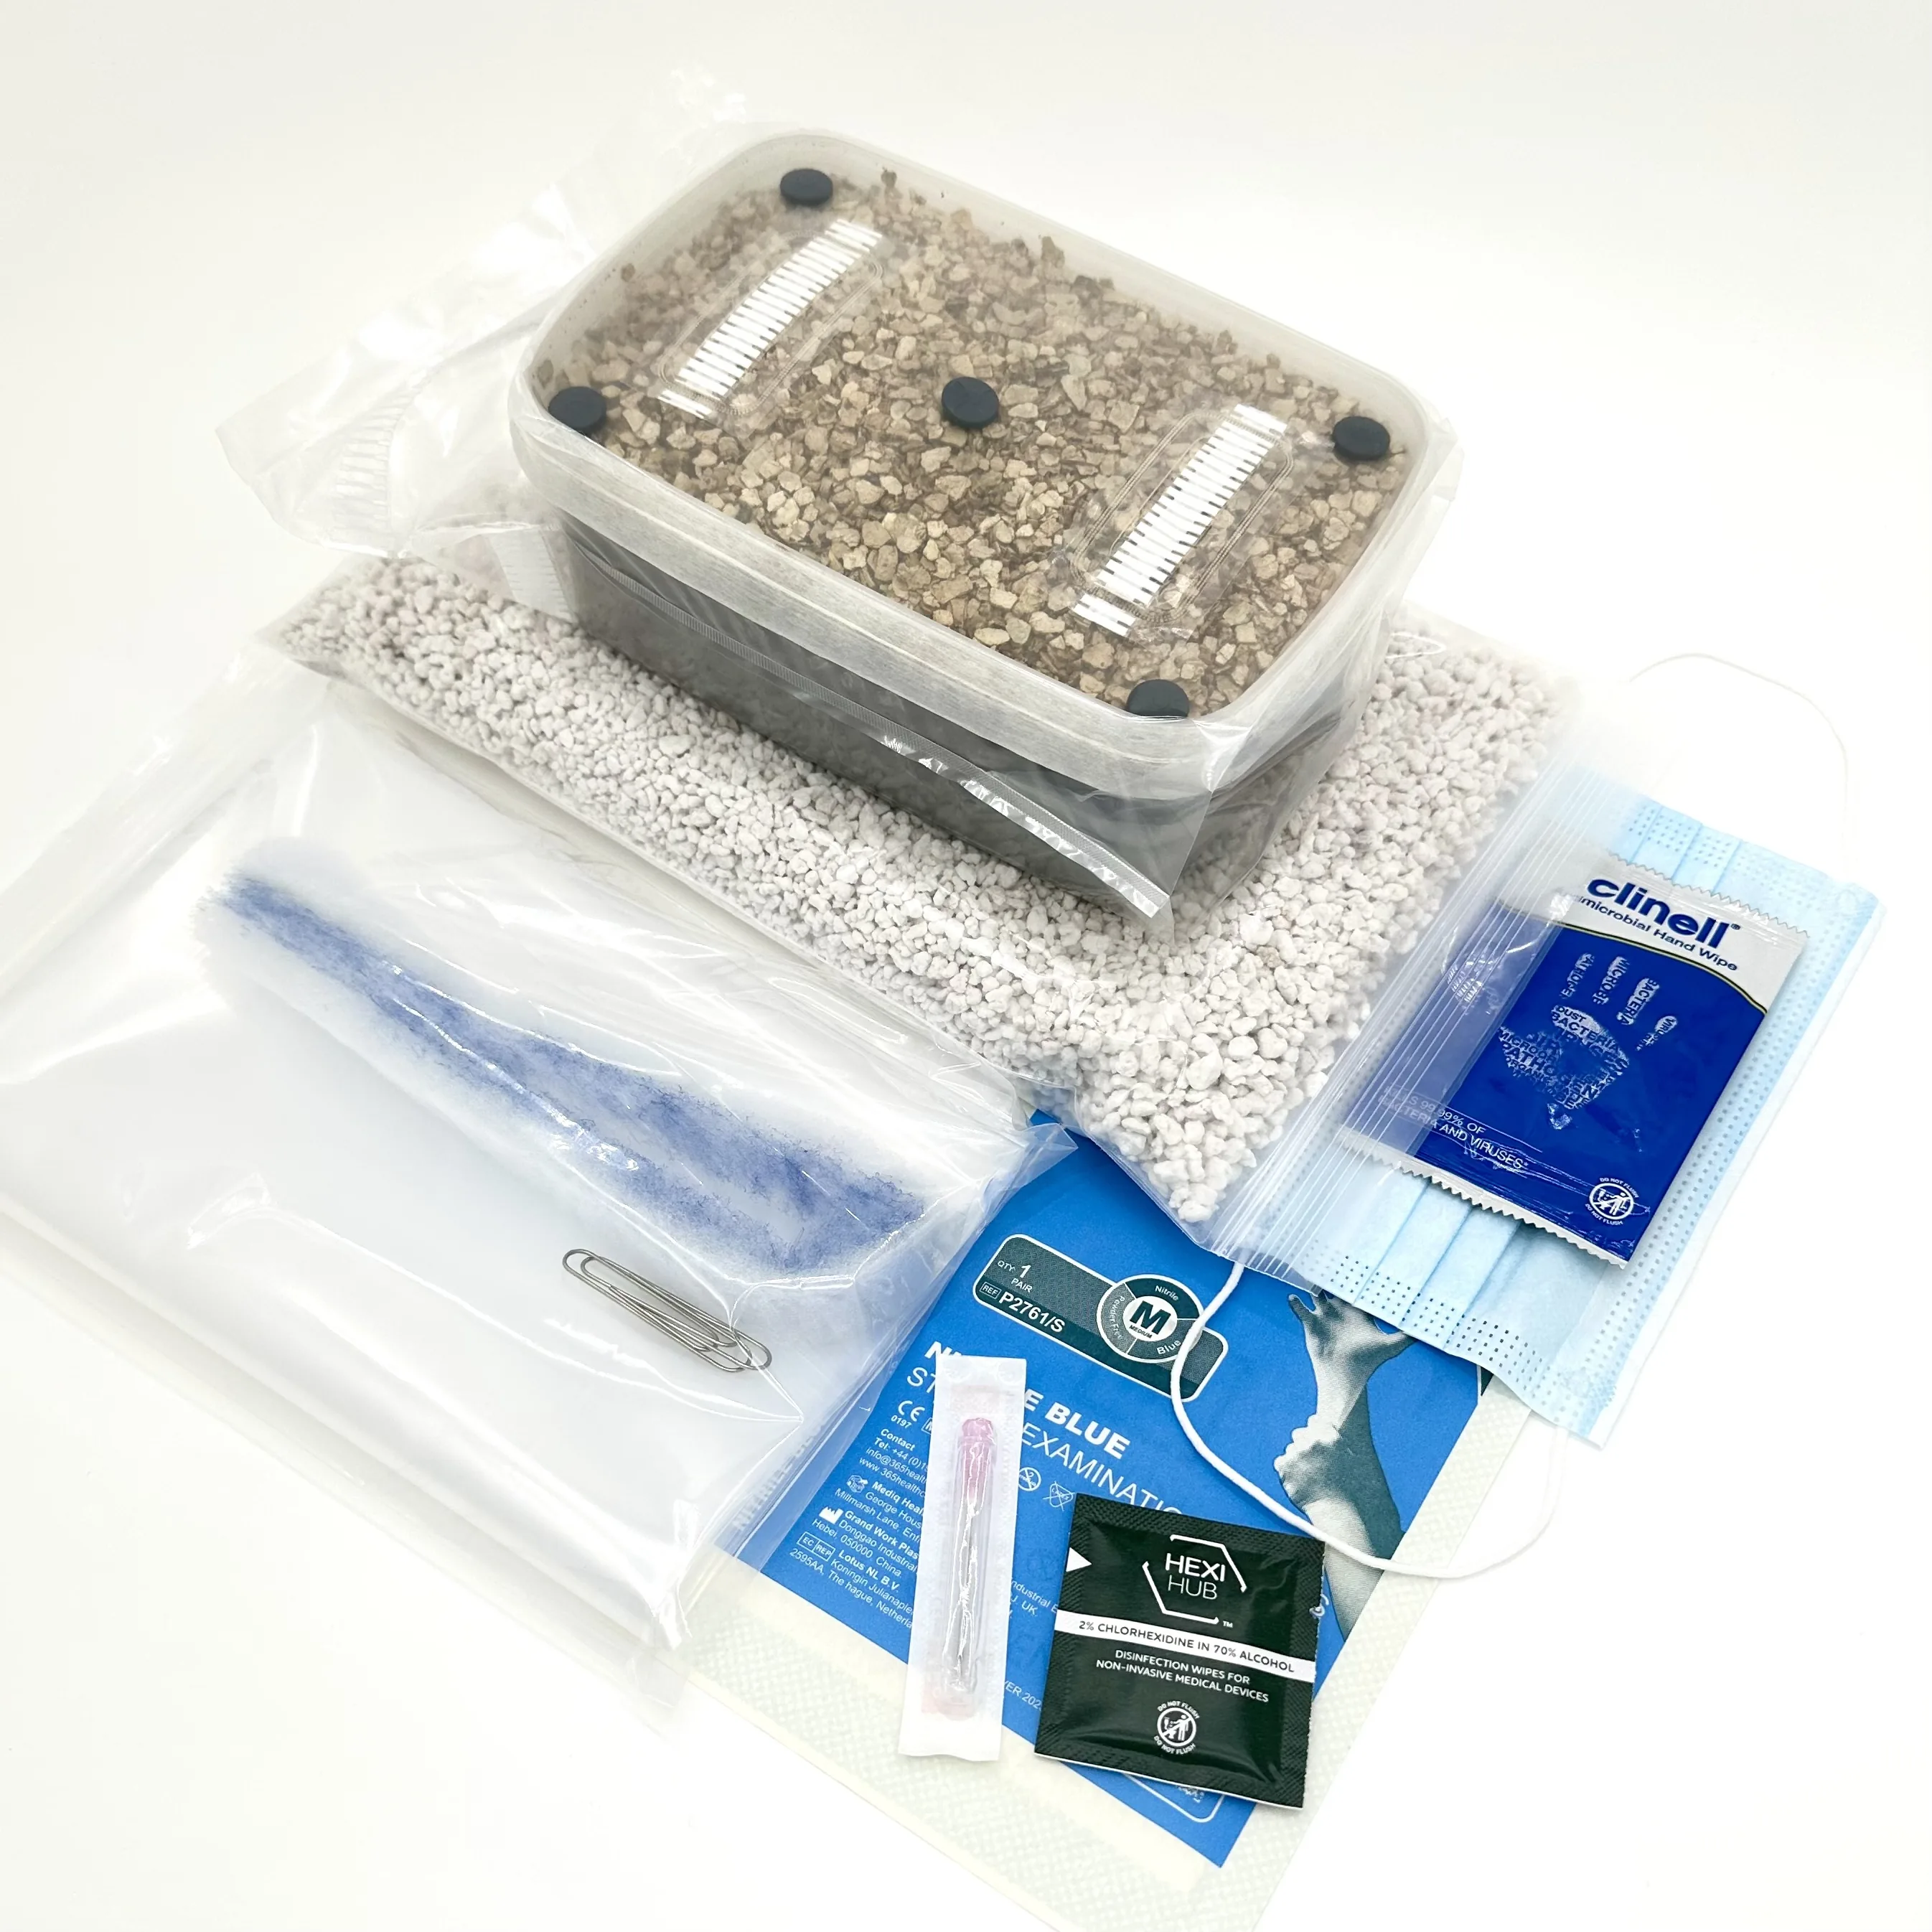
Show: Everything included in the Grow Kit version of the XL Cylocybe Special MycBox, laid out together: the sealed grow tub with its filter strips and injection ports, a bag of perlite, a liner bag, nitrile gloves, a face mask, alcohol and chlorhexidine wipes, and a sterile syringe
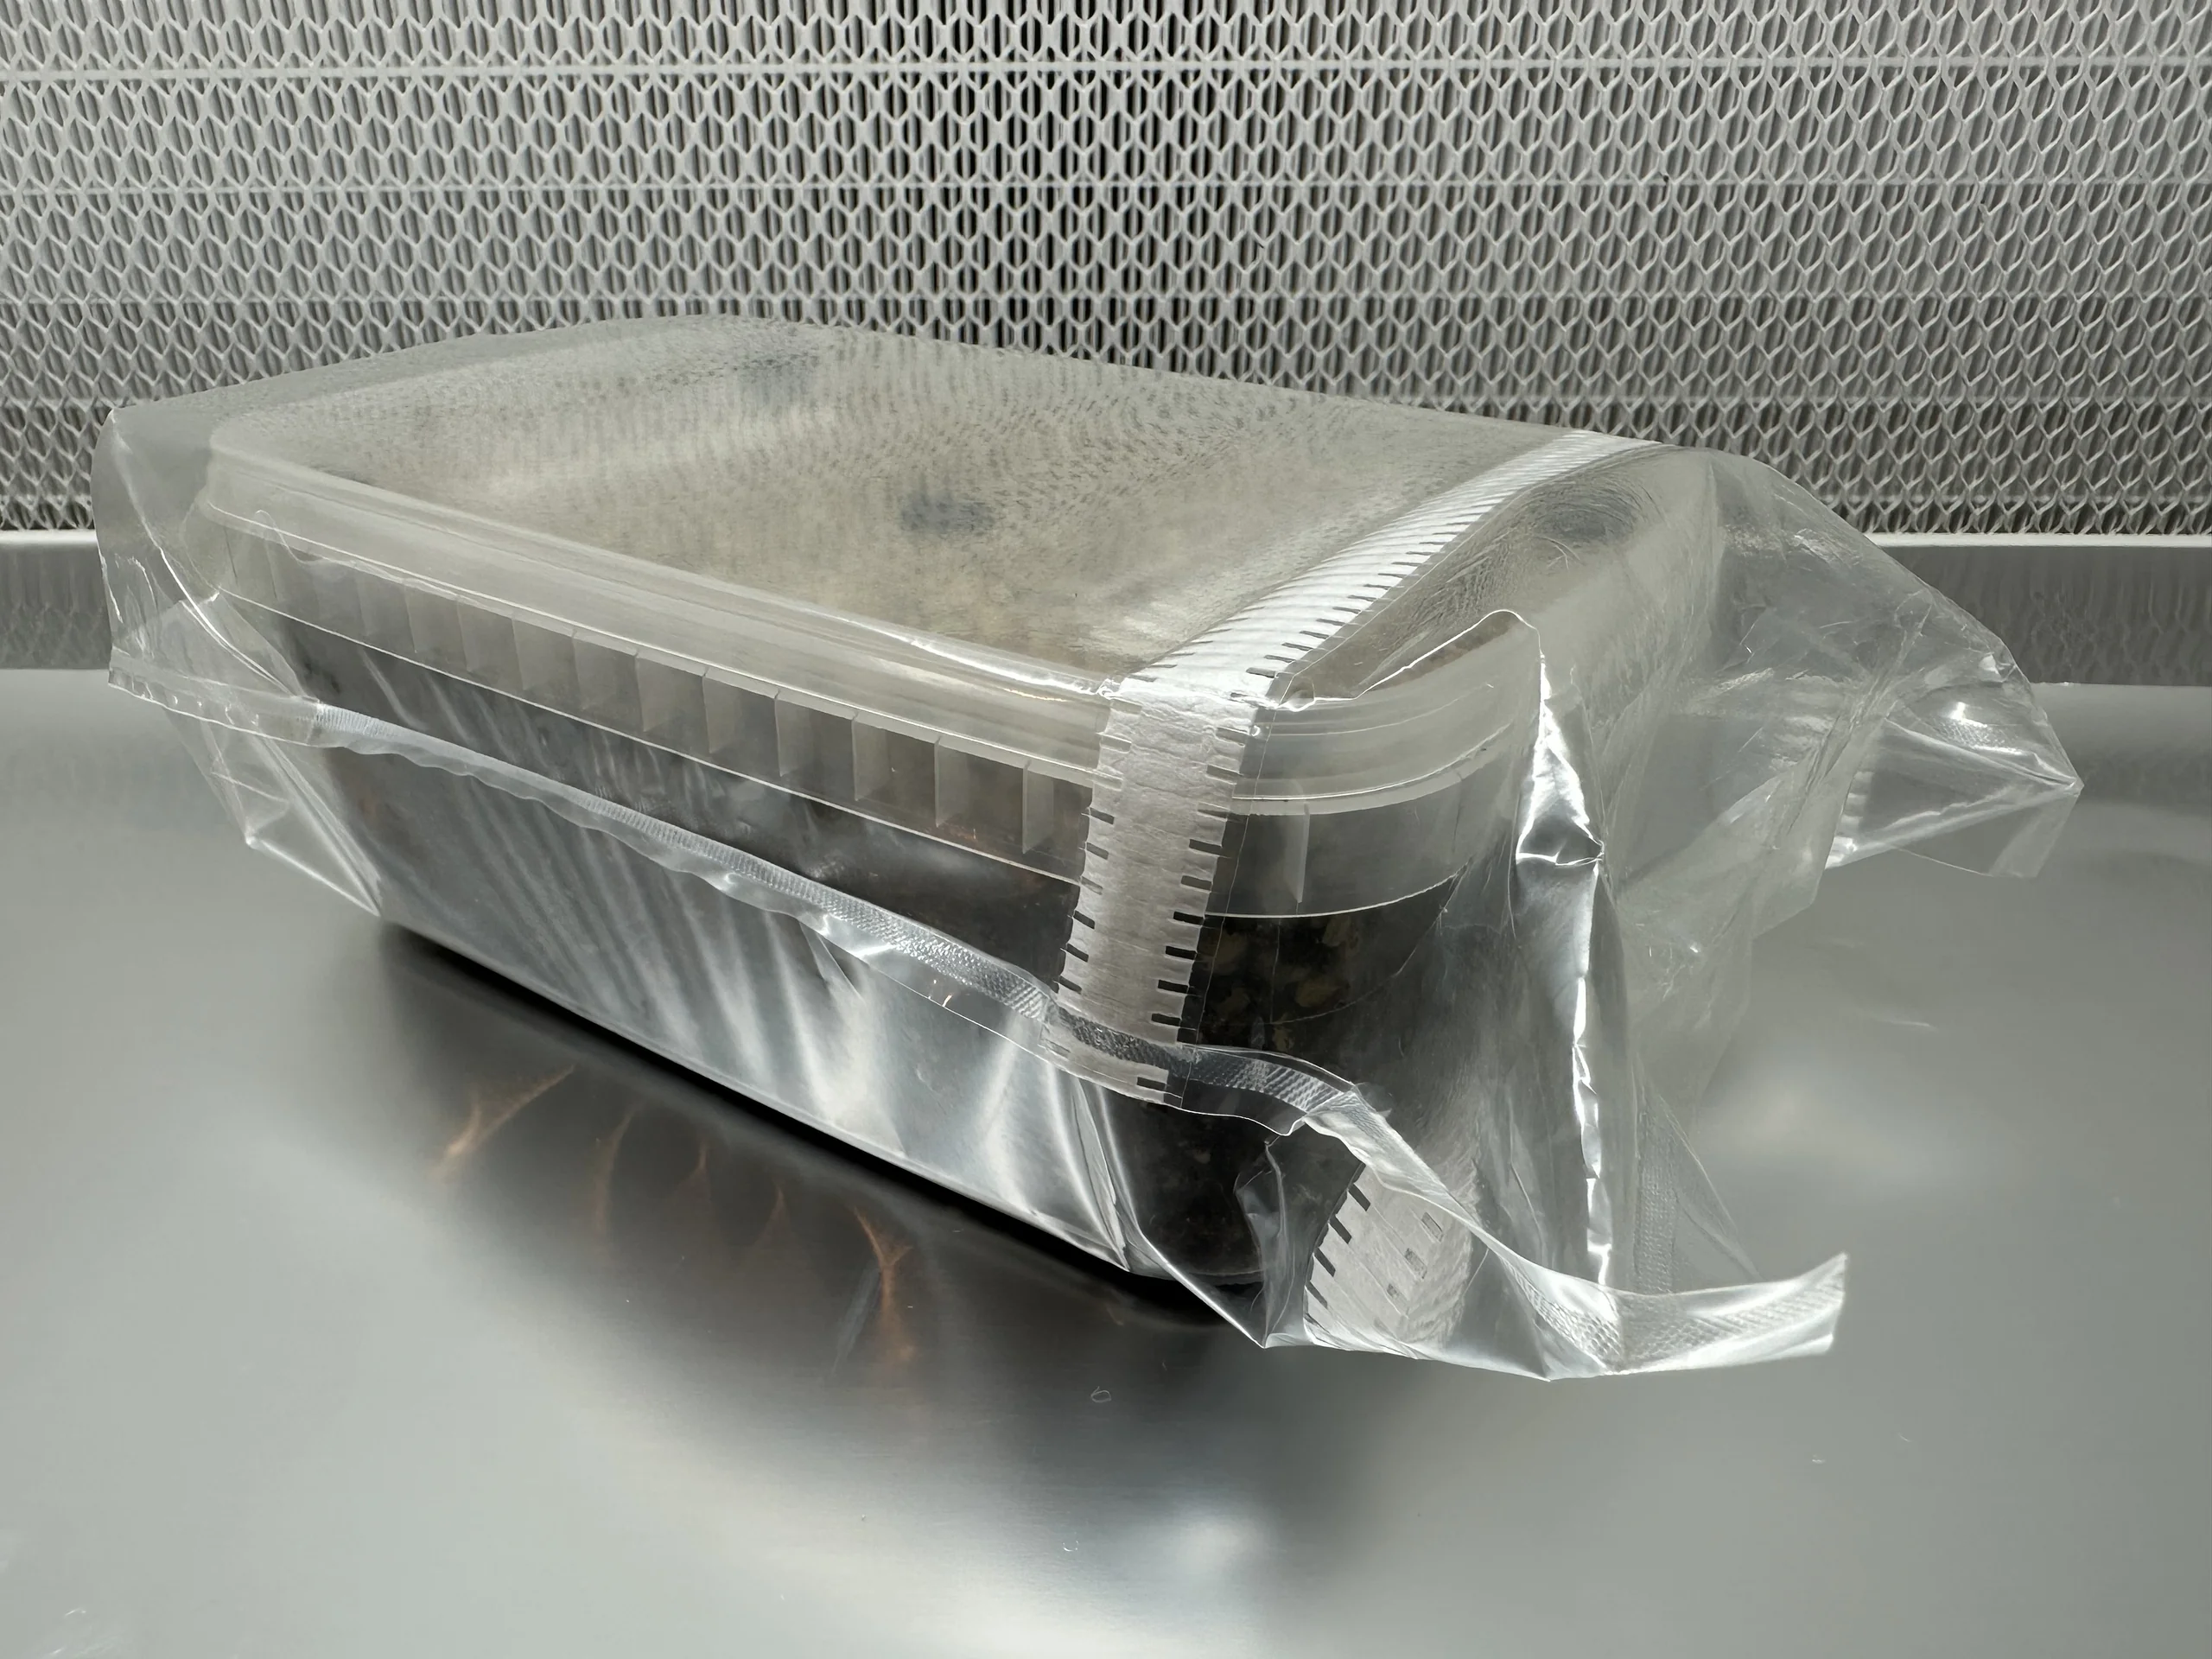
Show: An XL Cylocybe Special Mushroom Grow Kit sealed inside its sterile bag on a steel bench, in front of a laminar flow hood filter
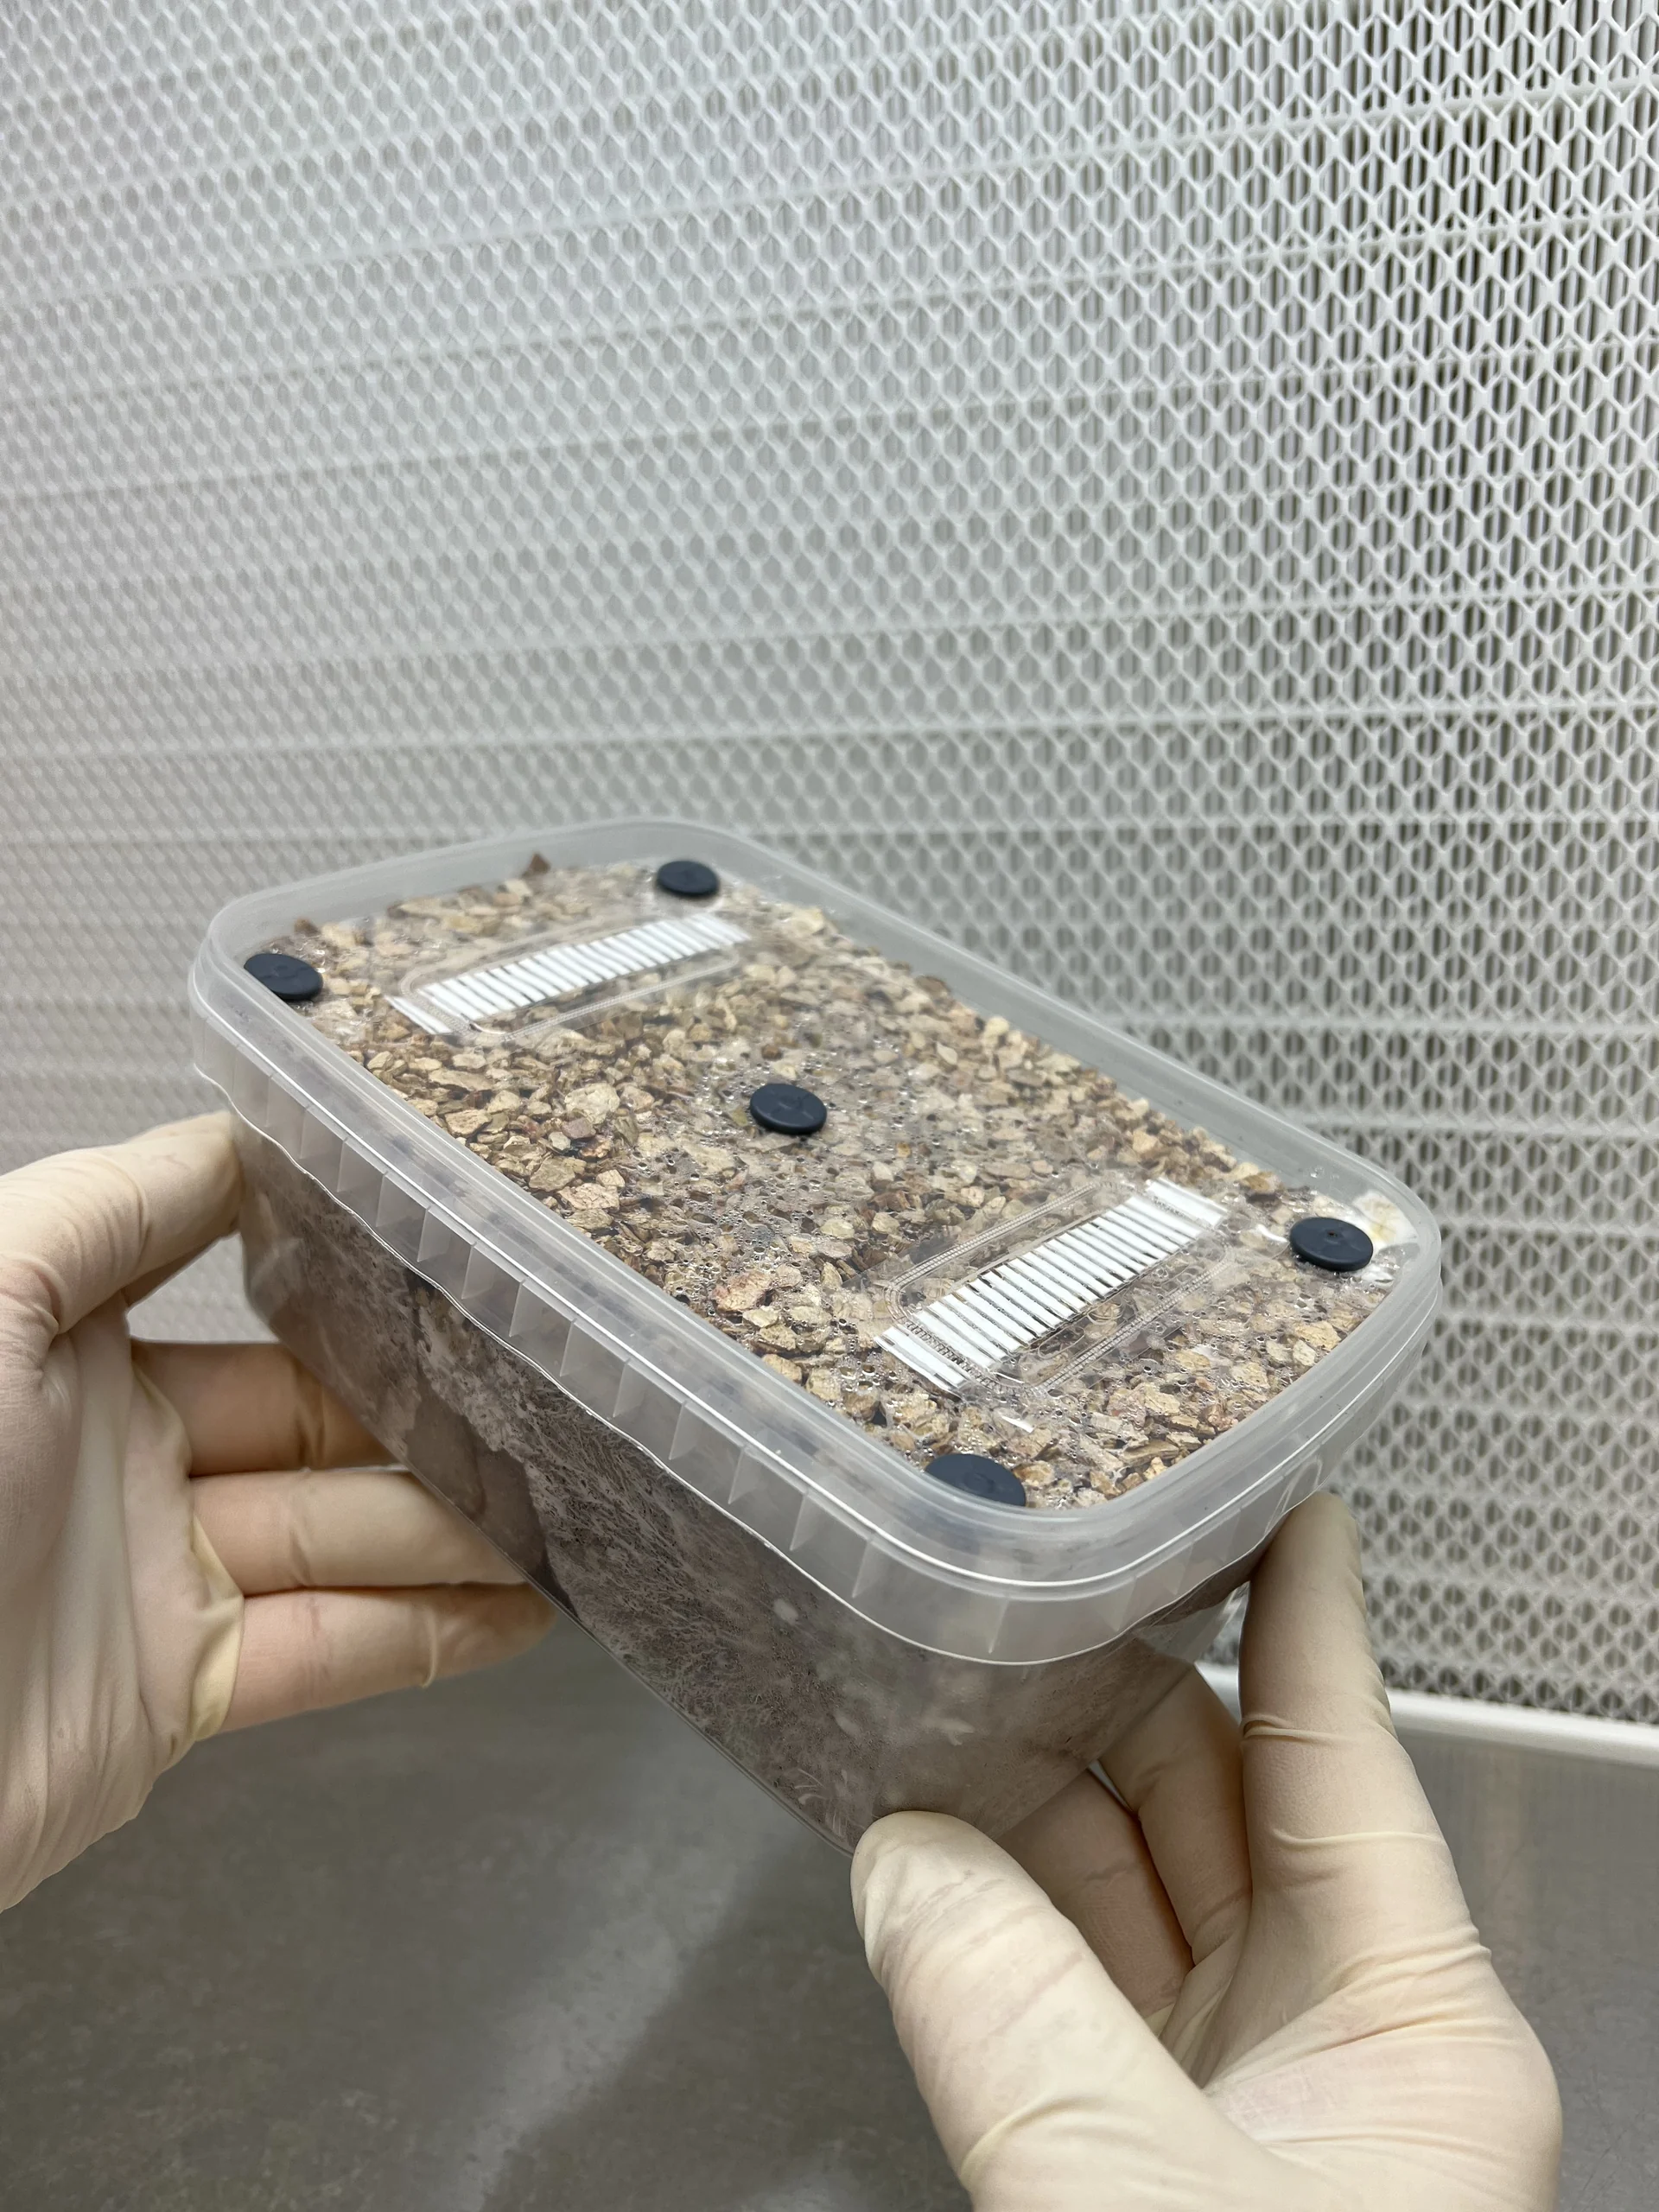
Show: Gloved hands holding an XL Cylocybe Special Mushroom Grow Kit, its lid showing two HEPA filter strips and black rubber injection ports
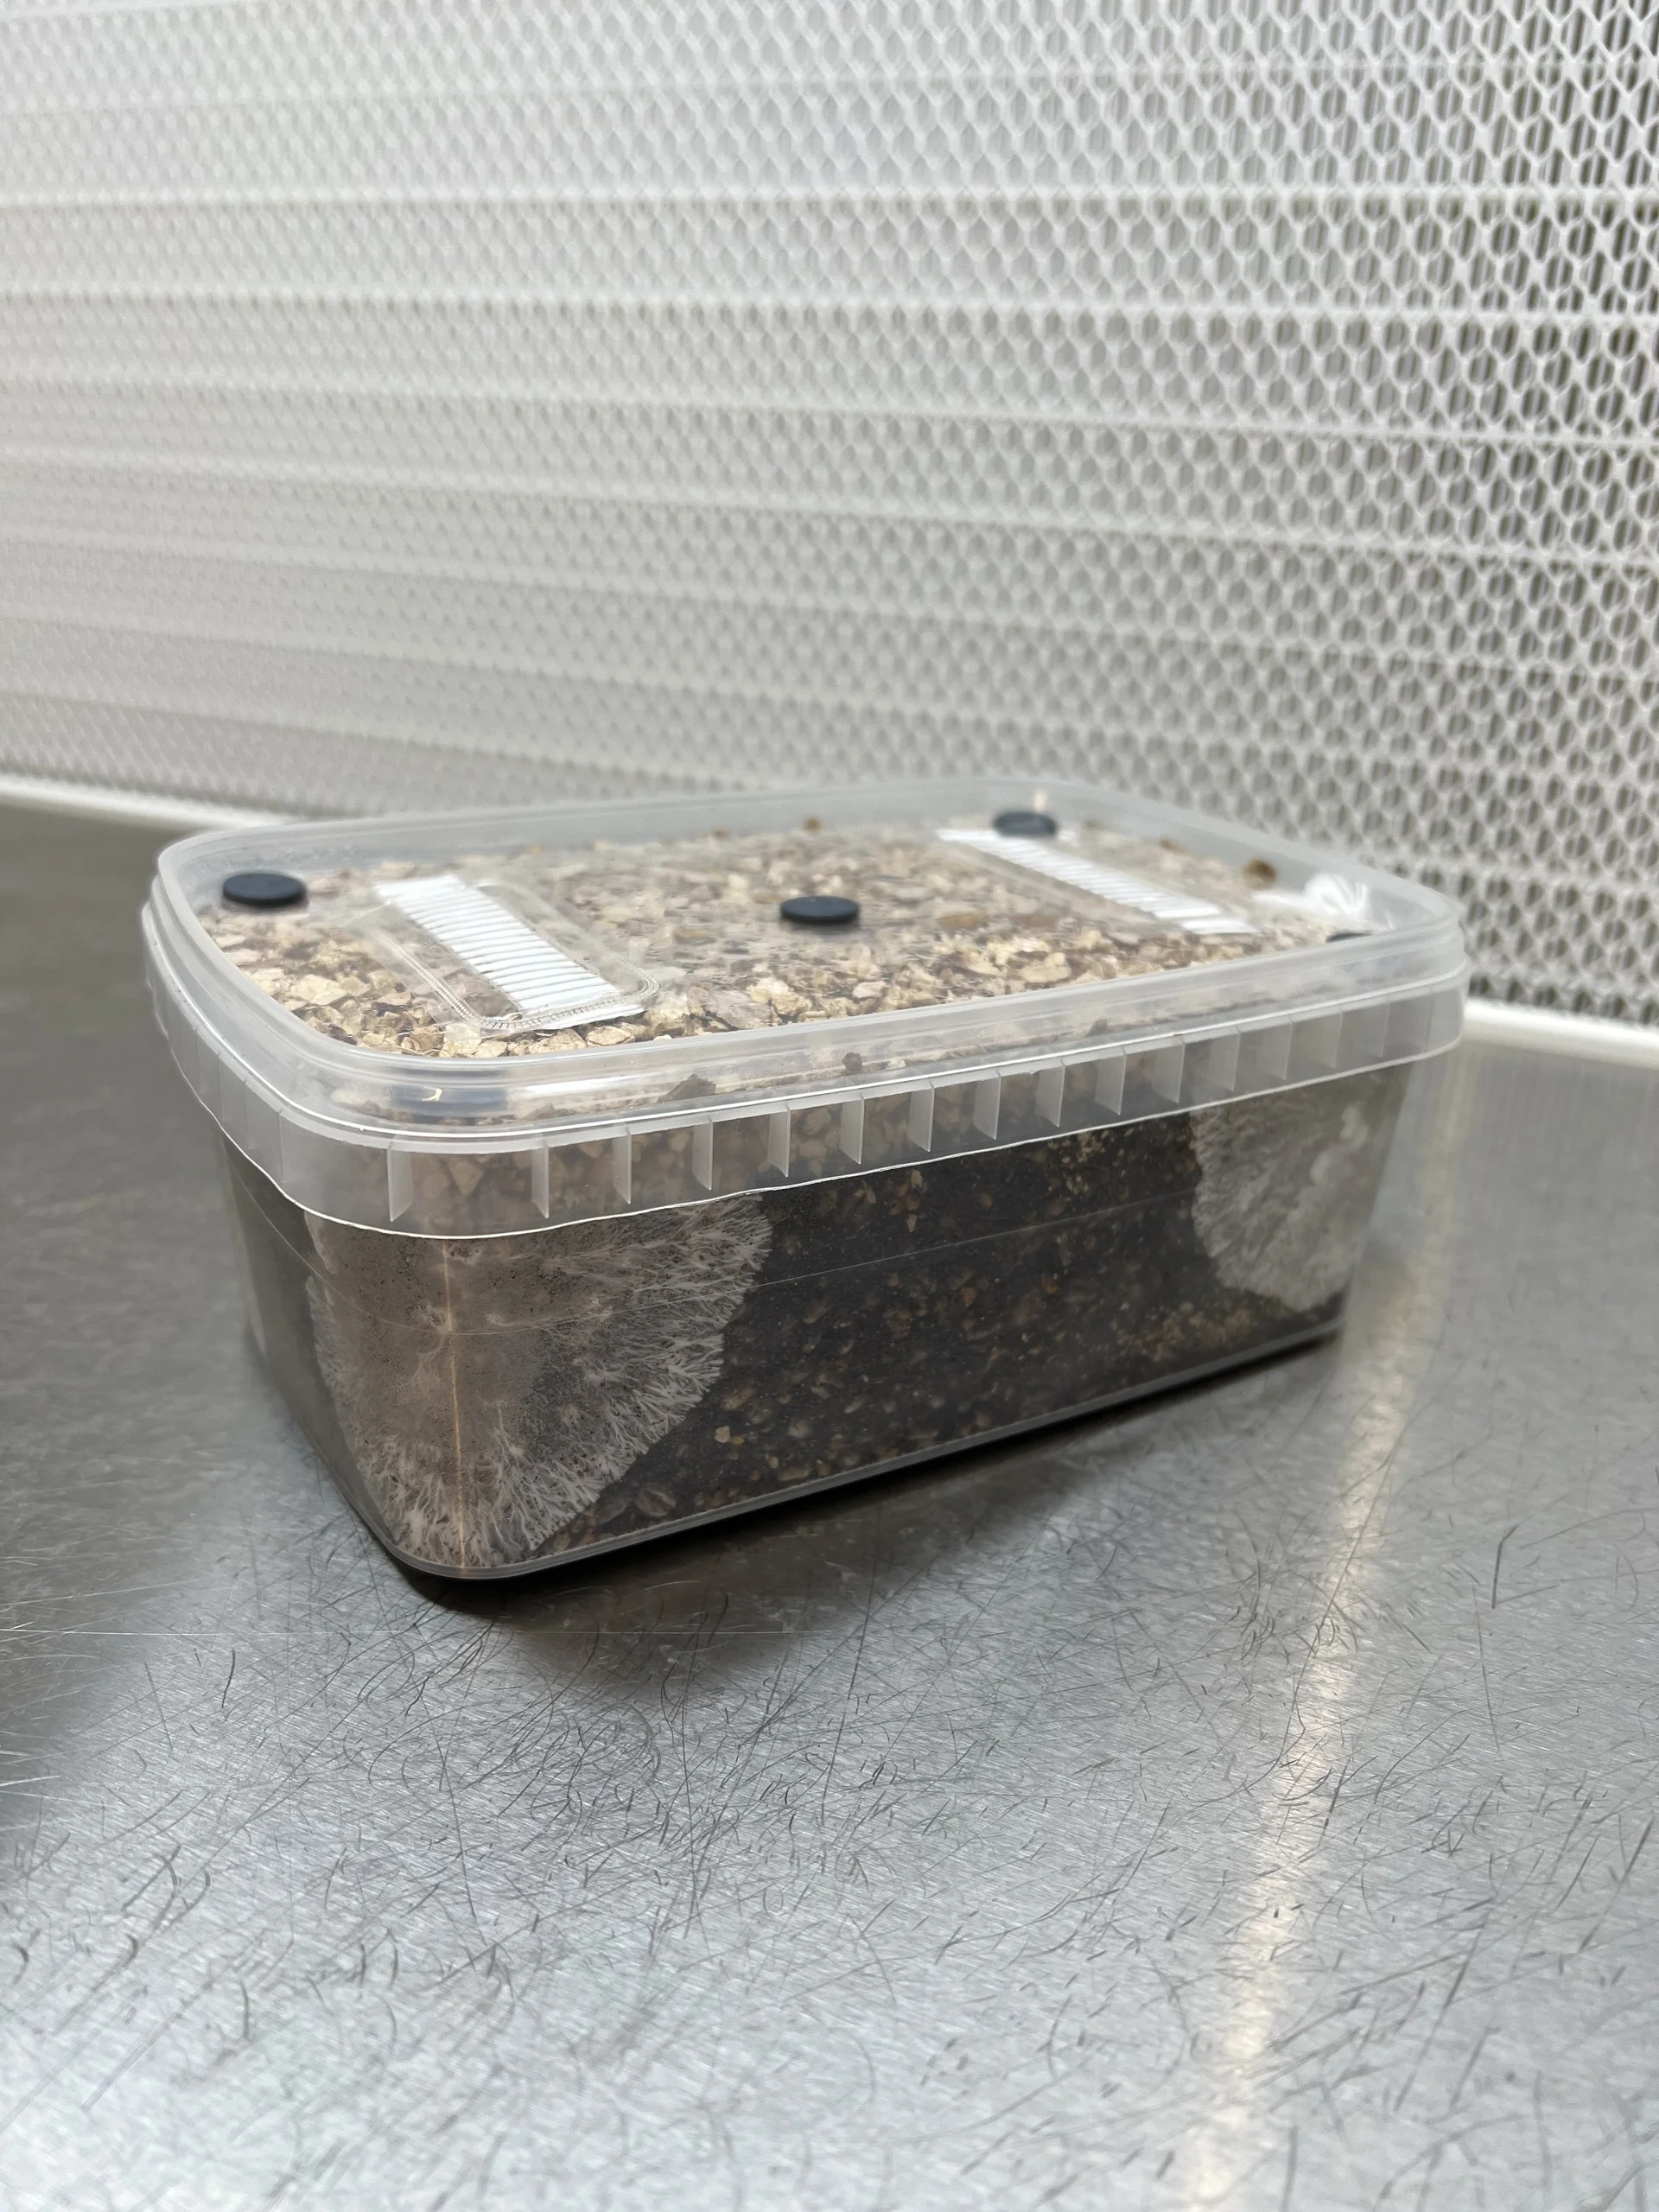
Show: An XL Cylocybe Special Mushroom Grow Kit on a steel bench, white mycelium visible spreading through the substrate
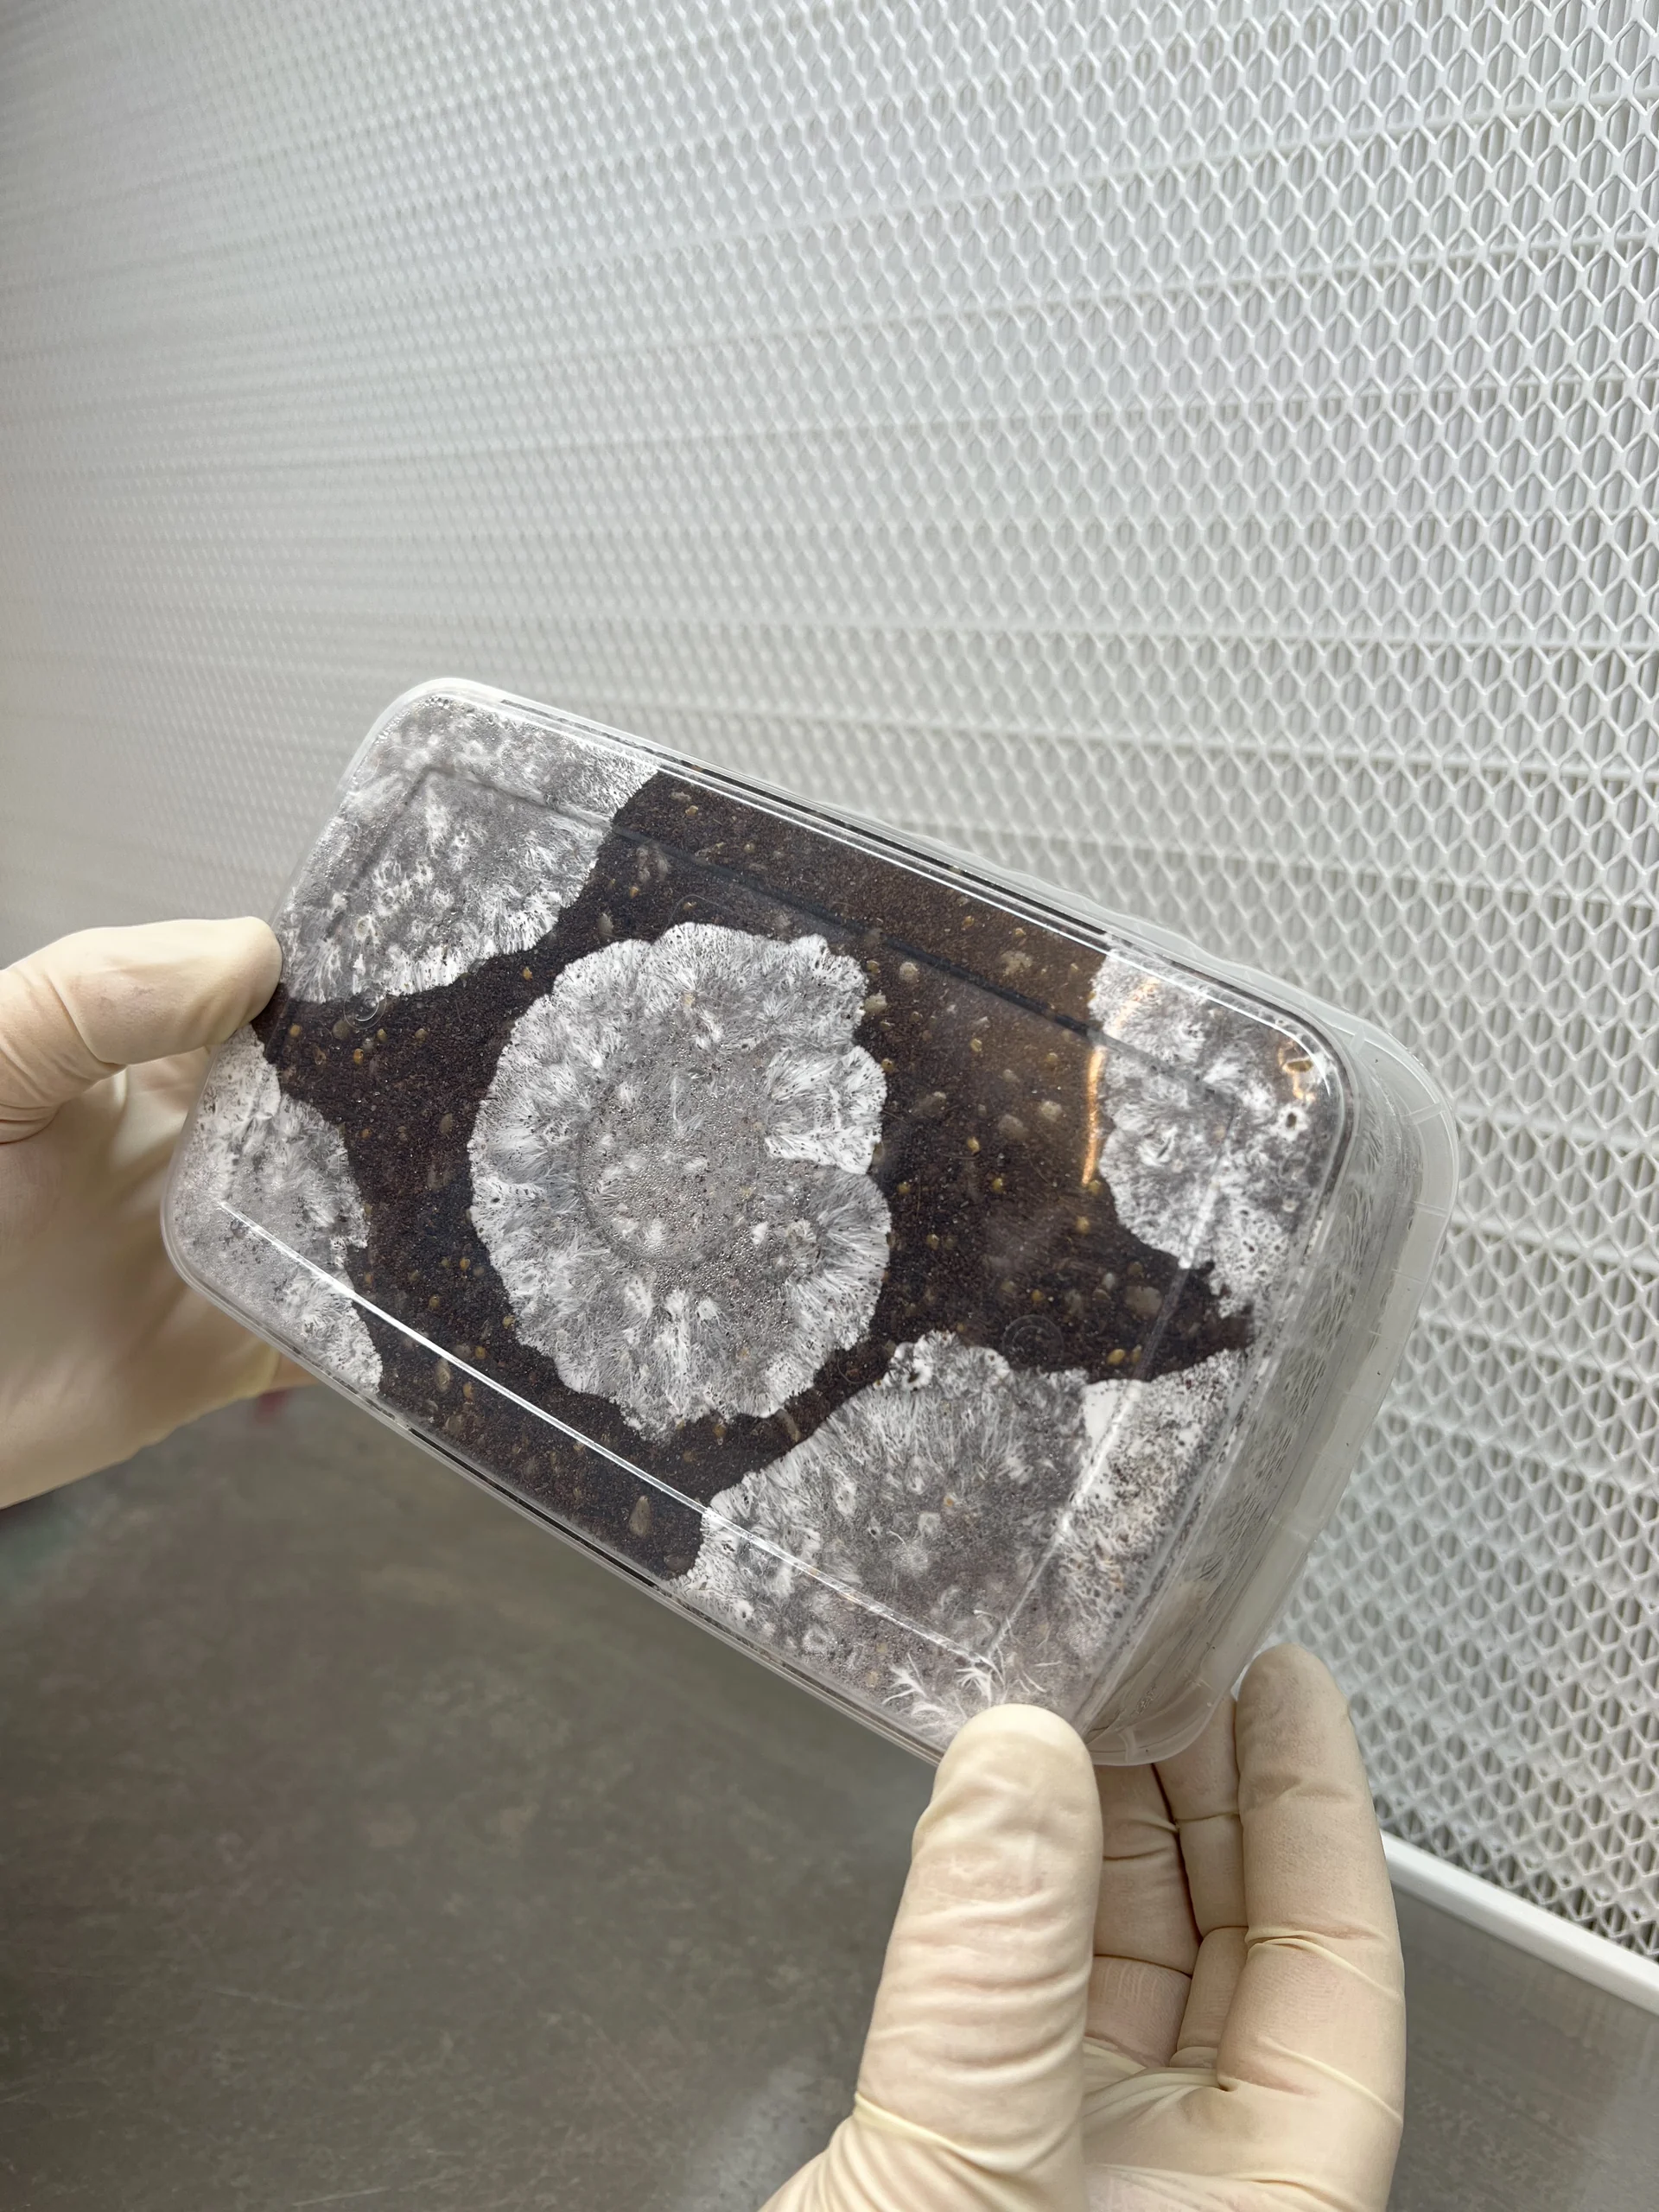
Show: The underside of an XL Cylocybe Special Mushroom Grow Kit, white mycelium rosettes spreading out from each injection point
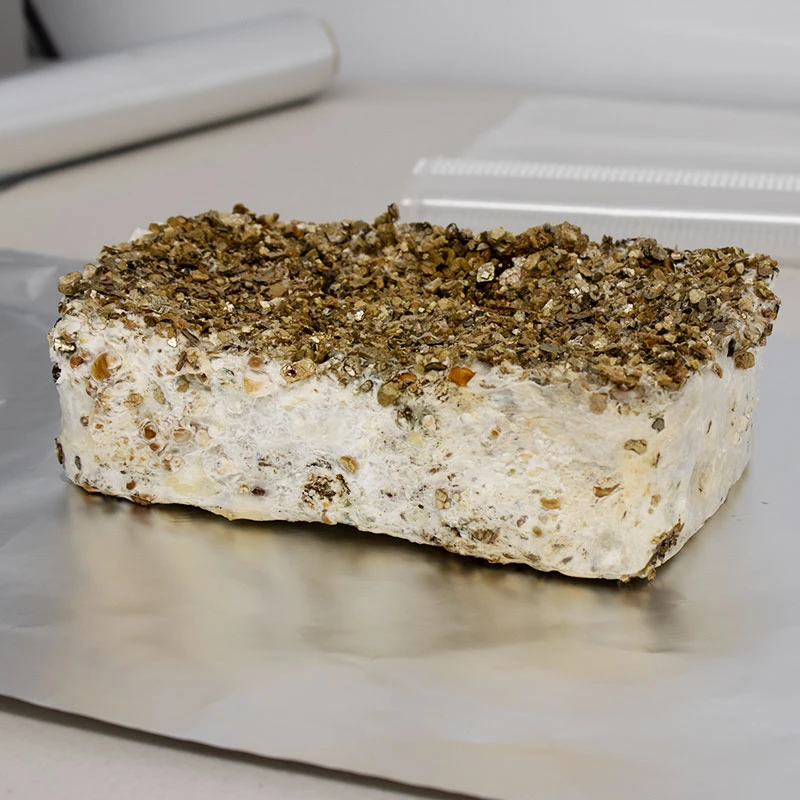
Show: A colonised substrate block lifted out of its tub, solid white mycelium below a layer of dark casing
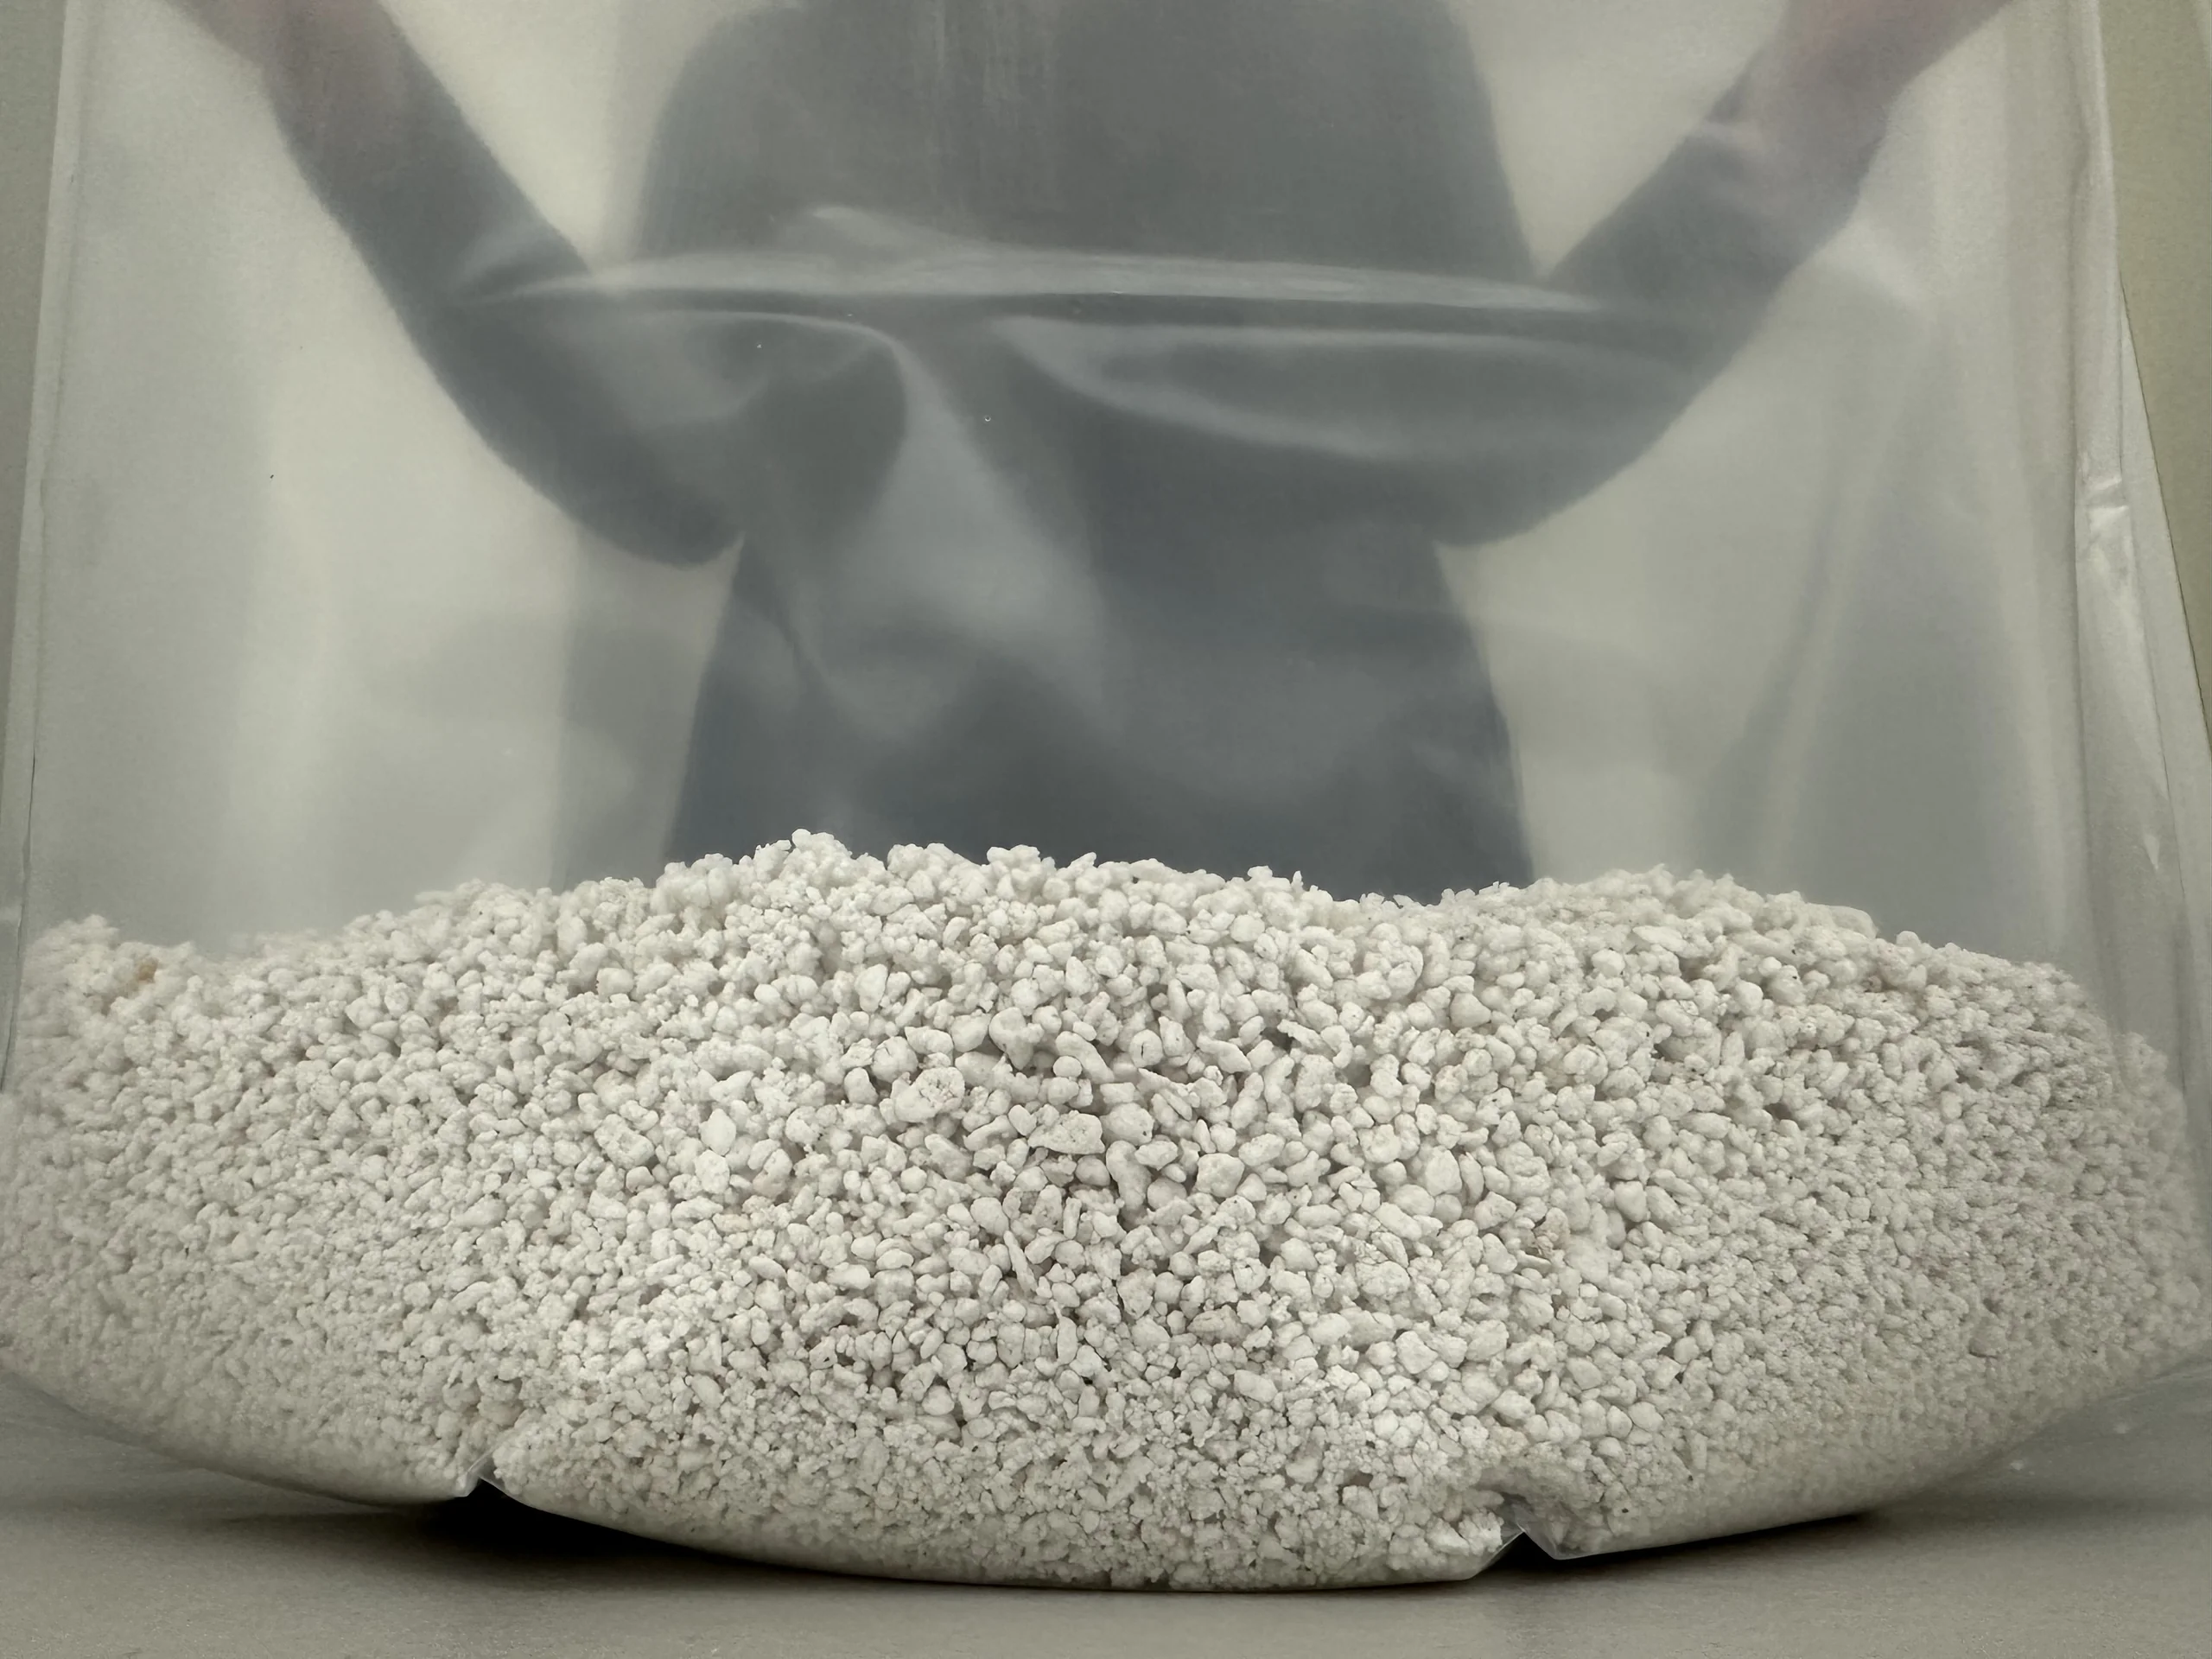
Show: An even bed of hydrated perlite spread across the base of a Cylo Grow Tent, held open from behind

Cylocybe Special MycBox (GK/S)

Used to be named "XL Cylocybe Special MycoBox Grow Kit", but a shop who first used the name for a different kind of grow kit has asked us not to use it.

This is still our same legendary kit that taught half the UK how to grow their first ever flush of mushrooms (and their second and third).

Enjoy.

Updates: Sat, 5th September: Now includes sterile gloves.
£25.00£34.95

Choose your kit

0-3 working day dispatch or free grow kit if we are late (UK-only pledge). Order and pay before 1pm Monday to Friday.

Cylocybe Special MycBox (Grow Kit / Standalone)

Offered as standalone (without all the extras) or a as the complete mushroom grow kit with everything you need (except for the gourmet syringe).

Complete grow kit

  • All-In-One MycBox Grow Kit with everything you need included
  • 1.2 Litres Rye Grain, Millet, Vermiculite, Coir, Gypsum (and a Coffee punch)
  • Sterile, HEPA-Filtered and Ready to Inject
  • Grow tent + FAE-Filter (V2.0)Β to fruit your mushrooms inside
  • Chlorhexidine Alcohol Wipe for wiping the 5 injection ports
  • Antimicrobial Hand Wipe
  • Sterile Needle (18G / 1.5" / Agani)
  • Facemask
  • Optional Sterile Gloves (New as of 5/9/2026)
  • 2 Litres Perlite to maintain peak humidity levels throughout fruiting
  • Online Guide

Standalone (MycBox only)

Choose to buy this standalone if you already have your own setup.

  • Sterile, HEPA-Filtered and Ready to Inject
  • 1.2 Litres Rye Grain, Millet, Vermiculite, Coir, Gypsum (and a Coffee punch)
  • Chlorhexidine Alcohol Wipe for wiping injection ports
  • Antimicrobial Hand Wipe
  • Sterile Needle (18G / 1.5" / Agani)
  • Facemask

Grow tent + FAE-Filter V2.0 (Codename: KISS)

We overengineered V1.0, 1.1 and 1.2 until we finally saw clarity by keeping it simple, silly.

Unlike previous versions of this grow kit, our new grow tent isn't just bigger; it allows you to grow on par with dedicated fruiting chambers. We include a specialised filter material used in industrial flow hoods, developed to work in highly humid environments, letting high airflow through it without any loss of performance, i.e. perfect properties for FAE (fresh-air exchange) at 100% humidity with a small footprint... Meaning from just a couple of small holes cut into each side of the tent and a wad of this type of filter stuffed through, you can get the right amount of airflow you need while keeping the humidity locked in. Essentially, this material has greater advantages than even the brand-name filters commonly used in the scene - with its smaller footprint (perfect for a grow tent) and controllable results instead of one-size-fits-all. Our previous grow tents (SacO2) were only ever able to produce excellent results after slicing the tent and stuffing in polyfill (polyester pillow stuffing) - but after a day or so the results would dwindle as the polyester would choke under the high humidity - not anymore, our new tent approach and filter material is finally the correct tool for the job and is completely unaffected by the extreme humidity levels you want in your kit.

How do you use the tent?

Well, there are NO holes on the tent - this is intentional... The amount of FAE is controllable by you. You snip a small hole along the crease of each side of the tent, then feed through a little bit of filter - this filter is laser cut and precise (meaning repeatable results every time). But, don't go too crazy with FAE holes, as the more you create the more humidity you lose - just like what would happen with brand-name filters if you put them all over your fruiting chamber. You want to start small with just one hole on each side at the substrate level, then work your way up by watching your mushrooms and observing what they're telling you... Thin stems, "fuzzy feet"? Add more FAE holes and filter them. Dry tent walls? Lower the FAE by plugging some holes with tape. You observe and you adjust. Our tent lets you work with it in a way that we've simply never had before - meaning for the first time, you can truly achieve flushes like you are fruiting in a dialled-in fruiting chamber.

Perlite tips

We have always recommended draining the water off perlite before putting it into the tent. No change there, we still recommend it. But once the damp perlite is poured into the tent, we recommend pouring two cups of water in on top. The main reason is that it makes your life easier later, if things ever start to look dry then all you need to do is put your hand to the bottom and turn the damp perlite over so it sits on top. It's a real time saver. BUT, be extra careful not to touch your cakes. It likely won't be the cleanest water, so treat it that way. Extra brownie points for the customers who pour a little 3% hydrogen peroxide in every couple of days - a bottle of 12% goes a long way in this hobby when you are diluting it and I've found myself using it for everything from defeating cobweb mould to filling into a double tub incubator / fruiting chamber water reservoir where I have a fish tank heater set to 23C. We used to sell bottles of it on here, but they just weren't getting the sales - bonkers considering how useful it is. If you don't like the idea of putting excess water into the tent, we recommend cutting a corner at least so you can regualrly pour water in and drain it. If you want to know how much humidity gets lost from your grow kit, consider weighing it each day and comparing with the last.

Advice

  • This grow kit is tailored for large flush sizes.
  • You don't need a SAB for this kit, but we still recommend using one for the inoculation stage.
  • Typically 5-8 weeks from start to finish. Can't give exact times because it depends on species, whether live liquid culture or not, temps, genetics, mother nature.
  • Colonisation temp of 23C (give or take a couple of degrees) for many popular species.
  • Fruting temp of around 21C (give or take) for many popular species.

Warning

If you live in a cold home, you need to build or buy an incubator. Don't use heatmats for the love of all things mushroom, we've seen countless people ruin this grow kit because they ignored us (then they go around sharing pictures as if it's the fault of the kit or even us) and it's extremely frustrating tbh. We put a lot of effort into our products, this is the premium you are paying for Cylocybe products and to waste it by not reading our guides isn't just a waste of your money, but it's a slap in the face to the time and effort that we put into our products. You wouldn't heat yourself up by standing on a hot frying pan. Don't listen to the other shops who sell kits like this, we are the OG with this injectable kit... Our guide will keep you right.
Replacement cover, explained

EZ-Replacement

This product is covered.

This product is covered if something goes wrong, so we can make sure you get another kit to try again with. The last thing we want is customers abandoning this hobby because of a mistake. So, if something goes wrong within 12 weeks of us dispatching it to you then follow the steps below to get a new kit on the way.

How a claim works

  1. Open the replacement portal. Sign in, or use the order code we sent you.
  2. Pick the order and the item. If more than one is affected, say how many.
  3. The replacement lands in your basket at £0.
  4. Check out and pay the postage. That is the only thing you pay.

No photos, no explanation, nobody to convince.

We built this shop to be human. When you need a replacement, take it.

Read how it works →

What customers say

Reviews

★★★★★ 4.7 from 76 ratings · 61 written reviews ✓ All from verified purchases

We don't pester for reviews at Cylocybe. We don't give freebies or discounts for them either, because it's just gaming the system - Amazon being the prime example of that which we can all agree on.

★★★★★✓ Verified

Was surprised that it actually started colonising at 20c in about 4 days.Decided to make an incubator to speed things up even more.So far so goodπŸ™‚

★★★★★✓ Verified

Very easy to work with

★★★★★✓ Verified

not used yet

★★★★★✓ Verified

Good product

★★★★★✓ Verified

its too early to say right now, but fingers crossed! I really like the look of the product though. The whole kit was superb.

★★★★★✓ Verified

Great!

Showing 1 to 6 of 61

XL CYLOCYBE SPECIAL MUSHROOM GROW KIT
INSTRUCTIONS

v5.026th August, 2026

A NOTE ABOUT YOUR GROW TENT

We went through a few different design variations for our new custom Cylo Grow Tents and so you may have a different tent than what this grow guide describes.

If you have a blue and white filter strip running up the centre of your tent, you don't need to do anything to prepare it, it's ready to go.

If there's a strip of micropore tape running up the centre of your tent, there are slits cut in the bag underneath the tape, that you will weave the provided filter strip through.

We're always here to help, so if you're unsure on the tent you have and want us to clarify, just get in touch! If you want to send over a photo of the tent, we can be sure we're advising you properly on how to use it πŸ™‚

Orders dispatched from 25th August will receive the grow tent described in the instructions below. So, if you receive your order after 25th August, you can follow the guide completely as it is written.

Thank you!

INOCULATION

We highly recommend working within a SAB (Still-Air Box). We sell lids that have arm holes laser-cut in them, sized to your preference, so you can easily add them to an IKEA Samla tub and have a SAB! We call them Sablaβ„’ - check them out here.

At the very least, work in a small, very clean and draught-free room. Make sure you're freshly showered and in clean clothes, then thoroughly clean your hands and forearms with a blue Clinell wipe and fit your face mask.

Prepare your chosen gourmet mushroom spore or culture syringe for use by screwing on a new sterile needle.

Carefully take your box out of its packaging. It's now exposed to the open air and potential contaminants - this is where working within a SAB will greatly reduce your chances of suffering a contamination.

Use a green Clinell chlorhexidine wipe to clean all of the grey rubber injection ports on the lid of the box. Don't touch, try to remove or inject through the white filter strips! They provide essential clean air exchange.

Pierce through the injection ports to evenly distribute 3ml of your gourmet spore or culture solution between all of the injection ports. Take care not to add any more than 3ml in total to your box.

COLONISATION

Now keep your box somewhere clean and safe. Mycelium is living and needs to breathe, so don't ever store your box in an airtight container or block the filters on the lid.

Temperature is extremely important for achieving good colonisation. Being too hot (above 26Β°C) or too cold (below 18Β°C) will very likely cause problems like contamination or slow to no growth.

Aim for 23C (give or take a couple of degrees) if you can, but crucially, do your best to maintain the temperature you're able to achieve. Don't let the temperature go up and down too much.

Avoid heat mats please! It's a very common mistake. They don't spread warmth evenly, which can cause excessive condensation and water build-up - an easy pathway for contamination to enter your box.

Consider building or buying an incubator if you're struggling to hold these temperatures - it's way cheaper than keeping your home heating on all the time and gives much better results.

At 23C (give or take a couple of degrees), it will generally take around 4-6 weeks for your box to fully colonise (this means the grains are completely covered in healthy, white mushroom mycelium) but this depends on a lot of different factors and also just that nature can simply be unpredictable!

Even once the substrate in your box looks fully covered in mycelium, it's best practice to give it an extra few days, to try and make sure the inside is also fully colonised before you move on.

DUNKING FOR MAX HYDRATION/HUMIDITY

When you're confident the substrate is fully colonised, you are ready to use a method called 'dunking' to prepare for fruiting. Do not ever take the lid off your box before full colonisation (if the dry vermiculite layer on top isn't covered in mycelium, this is okay! You are just looking for the dark substrate underneath to now be completely white).

Fill a container with water deep enough to submerge your colonised substrate (known as a 'cake') in.

Open your box and remove the colonised cake - it will be a solid block. Place this in the water and use something heavy like a plate to weigh the cake down and stop it floating. You need it to be fully submerged in water at all times. Put a lid on the container or cover it to keep everything clean.

Leave your cake dunking like this for anything between 6-24 hours... depending on how much patience you have! Obviously, the longer you leave it, the better your results will be.

HYDRATING THE PERLITE

First, you need to hydrate your perlite.

Please cover your mouth and nose when working with perlite and avoid breathing the dust in (it throws off a lot of dust when poured). If you do breathe some in, move into fresh air and rinse your nose/mouth.

The way we prefer to hydrate perlite helps to avoid the dust! Simply place your bag of perlite underneath a tap, carefully open the seal on the bag and turn your tap on to fill it with water. The perlite will float in water, so turn your tap off at the point your perlite is a few inches from the top of the bag.

Then, seal the bag closed again and fold over the top a few times, before lifting it up with one hand and holding the bottom of the bag with the other hand. Slowly and carefully move the bag around, flip it upside down and back again - basically, move the water around the perlite so it can absorb it.

Now you need to hold the bag over a sink or bath at an angle that allows water and unwanted debris to collect in a corner and cut a small hole in this corner to allow it all to drain out. It's best to place a strainer underneath the bag to catch any large bits of perlite that might come out.

When the water stops running out of the bag, lift it out of the sink and place inside your grow tent. Open it up and let all of the damp perlite pour into the bottom of your tent. Spread it out into an even layer, ready for sitting your grow kit on top.

If you don't fancy using this method, you can slowly pour your dry perlite into a strainer (please don't breathe in the dust!) and rinse under a tap for a while until it's soaking wet. Shake off some of the excess water and then pour it all into the grow tent.

PREPARING YOUR CYLO GROW TENT

First, cover the top set of holes in the tent with selotape, or you can re-use a couple of our stickers from your grow kit items, as they're easy to peel and re-stick.

Then, push a piece of filter material through every other set of holes in the edges of the tent. You can easily push each one through both holes on either side of the bag, grip with your other hand and pull through until you have an even amount of filter on either side.

Always have the white side of the filters facing out, with the blue side facing the inside of the tent.

When all the filters are in place, carefully stretch out the tent so that they sit flush to it.

Keep your remaining two filters safe and clean - you will put these in the top holes of the tent during the fruiting stage.

Now, cut a piece of tin foil slightly larger than your cake and place this on top of the perlite. You don't ever want your cake sitting on the damp perlite, as it can cause contamination.

Place your cake on the foil, then fold over the top of the tent and secure with clips or tape, so that humidity can build up inside.

THE BEST BIT... FRUITING YOUR MUSHROOMS!

Do your best to maintain a temperature of 21C (give or take a couple of degrees) at this stage to get the best results.

Humidity and FAE (fresh air exchange) are extremely important for pinning and healthy mushroom development, as is temperature and light. They all need to work in harmony.

Humidity will build up inside the grow tent from the extra moisture you added to your cake during the dunking stage and the damp perlite, and your tent has filters to allow for fresh air exchange.

The only time you'll open your tent is when you're ready to harvest your mushrooms - peeking even for a few seconds is enough to lose humidity and cause growth defects (aborted pins, caps breaking, etc).

Placing an electric fan somewhere in the room on a low setting will create a gentle air current and help increase the FAE inside the grow tent.

Your mushrooms will need light to grow. Indirect sunlight is fine, but if you want to use grow lights - a 6000-7000K LED or flourescent light a couple of feet away is recommended.

If you notice the inside of your grow tent looking dry, there are a few things which can cause this. Your perlite is not damp enough, the fan is too close, or grow lights are too close and hot.

Observe what's happening and adjust your setup as required - fantastic results depend on it.

After around 3-7 days you'll begin to see lots of tiny white dots - these are hyphal knots which will develop into primordia, aka mushroom pins... the exciting part!

When you start to see pins, remove the tape or stickers from the top holes of your tent and push in the two filters you kept previously. This allows more airflow for the fruiting stage.

It should then only take 4-5 days for the pins to grow into fully mature mushrooms ready for harvest.

During this time, they'll let you know if something isn't quite right - fuzzy mycelium at the base of the mushrooms and/or thin stems are an indication that more FAE is needed so increasing the fan speed might be something to try.

When the veil beneath one of your mushroom caps is about to tear off, this is when you should harvest your first flush. If you don't get there quick enough, spores will begin to drop from your mushroom caps and make a mess!

It's best to cut the mushrooms off with a clean scalpel or knife, you can also just pull them off but be careful not to damage the substrate too much.

After you've harvested all the mushrooms from your first flush, you can repeat the dunking stage to get more moisture into your substrate again.

You can rehydrate your perlite at this point too if it seems dry. Always be careful not to have any water pooling in the bottom of your tent though, as it's a contamination risk.

When you remove the cake from the water after dunking, give it a rinse under the tap and allow excess water to drain away before placing back into your grow tent.

You should continue to dunk your substrate after each flush, and if you've taken good care of it, you should achieve multiple flushes of mushrooms from your grow kit before the nutrients are all used up.

Happy shroomin'!

Cash, bank or Bitcoin Discreet UK dispatch Free replacements Over 5,000 reviews